Category: Fall

Six-Bananas Banana Bread Bundt Cake

Six-Bananas Banana Bread Bundt Cake-1

SIX bananas! Yep, you read that right! Do you think I’ve lost it? Hell, NO! Please read on.

We’ve been experiencing heavy downpours in the evenings around here since past 2 weeks and to me gloomy mornings and rainy evenings are synonymous with a slice of banana bread + a cup of strong coffee with a dash of milk. I love experimenting with my no-oil/butter and egg-free banana bread recipe (it’s a staple in my house and uses 3 ripe bananas) by changing the add-ins every time. I developed that recipe first by using raspberries but on other occasions I have added walnuts, chocolate chips, cocoa and strawberries add-ins.

This particular banana bread is all the more special because the batter here uses SIX (no kidding!) VERY RIPE bananas which imparts super-intense banana flavour to this bundt cake. I love all the above mentioned banana bread versions dearly but this here has become my favourite. I had very ripe banans sitting on the counter, begging to be used. The husband and I both ended up picking up a bunch of bananas on the same day. Due to chill in the air I have traded my usual breakfast of smoothies made with frozen bananas with piping hot cinnamon stovetop oatmeal so I had to come up with a way to use up this substantial quantity of bananas at my disposal. That’s when I developed this recipe which absolutely deserves a place in your repertoire too, prefect for times when you find yourself drowning in excess ripe banana situation like myself. I used some more bananas to bake chocolate chip banana brownies (recipe next up!) later in the week which turned out pretty good as well.

Six-Bananas Banana Bread Bundt Cake-2

This is your quintessential banana bread laced with sublime flavour from cinnamon and nutmeg. The addition of spices also makes your house smell divine while baking. Also, it’s baked in a bundt pan instead of a loaf pan and in my book, bundt > loaf! ❤️
Bundt cakes are truly awesome when baking for groups, potlucks and picnics. This cake is soft, moist and the crumb; gorgeous. It could be baked ahead and travels beautifully because it’s quite sturdy. Serving it warm just out of the oven is highly recommended and so is generous drizzle of sea salt caramel sauce. A scoop of vanilla takes it few notches up and is just the thing for your post-dinner dessert cravings. You could obviously have a slice for breakfast because B-A-N-A-N-A-S!

I’ll leave you to a recipe now. Do leave a comment if you have any questions or just to say hi. Have a great rest of the week people!

Six-Bananas Banana Bread Bundt Cake-3

Print Recipe
Six-Bananas Banana Bread Bundt Cake
Course Cake, Desserts
Cuisine American
Prep Time 10 minutes
Cook Time 60 minutes
Servings
slices
Ingredients
Course Cake, Desserts
Cuisine American
Prep Time 10 minutes
Cook Time 60 minutes
Servings
slices
Ingredients
Instructions
  1. Preheat the oven at 180ºC/350ºF. Grease the bundt pan with oil and set aside.
  2. In a large microwave-safe mixing bowl, melt the butter at high power for 30-60 seconds. Let cool for 5 minutes. Whisk in eggs using hand whisk, one at a time, until completely incorporated followed by white sugar and cane sugar. Whisk in yogurt, vanilla and 2 1/2 cup mashed bananas.
  3. In another bowl, whisk together all-purpose flour, cornstarch, baking soda, cinnamon, nutmeg and salt. Gently fold in dry ingredients to the wet ingredients using rubber spatula.
  4. Transfer batter to the bundt pan and bake for 55-60 minutes. Mine was done in 57 minutes exactly. Let the cake cool in the bundt pan placed on a wire rack. After about 10 minutes of cooling, invert the cake on wire rack and pour sea salt caramel sauce on top. Slice and serve warm. Store cake in an airtight container in the refrigerator for 3-4 days.
Recipe Notes

I have used 1/2 cup sugar in total in this recipe as I wanted to top the cake with sea salt caramel sauce. You could add another 1/4-1/2 cup sugar to the cake batter if you prefer sweeter cakes.

Shop the recipe:

Here are some items I used to make today’s recipe.


Some of the links above are affiliate links, which pay me a small commission for my referral at no extra cost to you! Thank you for supporting Cook By Book.

Share this recipe:

Chocolate {Whole} Pear Orange Loaf Cake

Happy ‘world chocolate day’ guys! Hope you are celebrating by eating your weight in {dark} chocolate. I also hope you are able to watch chocolatier Willy Wonka in his delicious chocolate kingdom or see Bruce gobble up THE chocolate cake and eating or drinking some chocolate alongside them!

The weather around here has been so pleasant and downright gorgeous past few days. It hasn’t been raining as much as I would like but it’s been cool and breezy. So on one such lovely Sunday evening, I was craving something chocolatey and wanted to bake this delicious Life By Chocolate Cake from the blog archives which is embellished on top with red pear halves and cinnamon but instead decided to bake something new for the blog. I had ripe red pears which were begging to be used so this time I used them pears whole and added orange zest and juice to the mix! It’s a straight forward recipe using simple pantry ingredients except for red pears which are by the way in season right now so go find them before they disappear.

Have a lovely Friday guys!


Print Recipe
Chocolate {Whole} Pear Orange Loaf Cake
Course Cake, Desserts
Cuisine American
Prep Time 20 minutes
Cook Time 55 minutes
Servings
slices
Ingredients
Course Cake, Desserts
Cuisine American
Prep Time 20 minutes
Cook Time 55 minutes
Servings
slices
Ingredients
Instructions
  1. Preheat the oven at 170°C/350°F. Grease the 8×4-inch loaf pan with oil and set aside.
  2. In a large bowl, whisk together whole wheat flour, all purpose flour, cocoa, cinnamon, baking powder, baking soda and salt. Set aside.
  3. In a separate large mixing bowl, whisk together orange zest and cane sugar. One by one, whisk in oil, egg, yogurt and vanilla until completely incorporated. Peel the pears at this stage.
  4. Add dry ingredients to wet ingredients in 3 parts, alternating with orange juice, mixing gently with rubber spatula. Start and end with dry ingredients. Do not overmix. The batter will be thick but if the consistency is too thick to even stir add a splash of orange juice.
  5. Pour the batter in your prepared loaf pan and arrange the four whole pears at the equidistance, pushed in to the batter (as seen in the picture below). Bake for 50-55 minutes or until a toothpick inserted in the center comes out clean or with few moist crumbs. Do not overbake as it may make the final product dry. Let the cake rest in the loaf pan for about 10 minutes before inverting it on a cooling rack. Let cool a bit before slicing. Serve warm with a scoop of vanilla ice-cream or a spoon of plain greek yogurt. The cake stays fresh for 3-4 days in refrigerator when stored in an airtight container.
Share this recipe:

5-minute Tomato Pasta Sauce ~ Meal for Two & Some Chit Chat

5-Minutes Tomato Pasta Sauce1


Let’s chat, shall we!? Time to end the lazy slump I’ve been rolling in lately. A lot’s been going on around here and I’m up for a full disclosure now. I did slip the news on Instagram couple of weeks ago but didn’t announce officially on the blog. So here it goes!! Drum-rolls please!!! I am going to LONDON this FALL for a one year postgraduate programme!!!!! WOHOOOO!!!!!!! HOW AWESOME IS THAT?!! Sorry for all the yelling but I’m SOOOOO excited for this new chapter of my life to begin. This year has been truly magical so far!

I got the confirmed offer on my admission about a couple months ago but was skeptical on sharing the news as there were so many things to consider and plan for before I decide to accept the offer. Let’s just say I didn’t want to jinx it! I was ecstatic (to say the least) to get into this prestigious college. I was (still am!) over the MOON would be an understatement. I leave in September and there is so much to do. I need to visit my parents, apply for Visa, do the shopping, pack my bags and off I go. Fingers crossed for a smooth sailing!

Now here is a bit of not-so-good-news. Umm… I’m not sure if I’ll be able to continue blogging along with my studies but I’m not going to incessantly worry over something I can’t control. As of now, the only thing I’m sure of is that the programme is going to be very intense and I am going to have to give my 101% attention to it, even if blogging takes a backseat. I AM absolutely ready to prioritize. I love blogging so much therefore I’ll be blogging here as much as I can until September and after that we’ll see how things go. I would love to pop over in between during my stay in London to share my experiences in new country, food related or not. I will definitely try to stay as active as possible on Instagram nonetheless so do follow me there to stay in touch and be my companion on #LondonDiaries! 🙂

*Recipe*

This recipe I am sharing today is bonkers awesome! It is the quickest meal I have ever made (apart from toss-in-all-you-have salads or couscous!). If you can boil the pasta then you can make this recipe. This one here is basically foolproof! The tomato paste (Brand name – Splitz) I used for this quick pasta sauce is made locally in Bangalore and the ingredients list reads – Tomatoes. That’s it! It does not have any funky ingredients I can’t understand or pronounce, just pure tomato goodness without any color or preservative or salt! Too good to be true and but sadly, it is mostly available only in Bangalore. But fret not. You can go ahead and try any other good, organic tomato paste you can find in the store near you.

This packet is definitely going with me everywhere I travel. I guess it’d be a blessing during my soon-to-start student life! What a cheap, no-fuss and delicious meal option with so many possibilities. Add any number of vegetables to this dish to make it more hearty and fulfilling. Just a heaping Tablespoon of this potent tomato paste is enough for one portion. You can tell I’m quite impressed! What can I say, sometimes simple is truly THE BEST! xx


5-Minute Tomato Pasta Sauce2


Quickest Tomato Pasta Sauce ~ Dinner for Two

Yields: 2 generous servings | Prep time: 2 minutes |Cook time: 15 minutes | Total time: 15 minutes

Ingredients:

  • 2 cups macaroni pasta
  • 1 cup pasta water, reserved after boiling
  • 2 Tbsp olive oil
  • 4-5 cloves garlic, finely chopped
  • 1 small red onion, finely chopped
  • Scant 1/4 cup tomato paste
  • 1 tsp salt or more to taste
  • 1/2 tsp dry basil herb
  • 1/4 tsp freshly cracked pepper
  • Shavings of Parmesan cheese
Directions:
  1. Cook pasta as per the package instructions. Reserve 1 cup of pasta water and drain the pasta.
  2. In the meantime, heat the pan on a medium-high heat. Add olive oil, garlic and onion and sauté for a minute. Add tomato paste and salt and sauté for about 2-3 minutes, scraping and stirring occasionally. The tomato paste will turn brown and this will enhance the flavors. Mix in basil and pepper and cook for another minute.
  3. Stir in 3/4 cup of reserved pasta water to the tomato paste and magically you’ll get your pasta sauce ready! If you want thinner consistency sauce, add remaining 1/4 cup pasta water too. Stir in the drained pasta. Divide between 2 serving dishes. Top with some shavings of Parmesan cheese and fresh basil leaves. Serve immediately.

Notes:
*You can add vegetables of your choice to make the meal more hearty. Just sauté the vegetables along with garlic and onion before adding tomato paste to the mix. Zucchini, broccoli, eggplant, bell peppers…. sky is the limit!
*You may also top the pasta with capers or olives.
*Use whole wheat or quinoa pasta to make this meal healthier. 
*Use penne or spaghetti pasta instead of macaroni.

Share this recipe:

Vegetable Whole-Wheat Noodle Bowl ~ For Two

Vegetable Whole-Wheat Noodle Bowl ~ For Two1


This peanut butter-flavored dish is a cinch to throw together. So convenient on a weeknight or when you’re just lazy. Just boil a pot of water, saute some vegetables and whisk together some sauces from your pantry. Dinner is served!

Vegetable Whole-wheat Noodle Bowl

Serves:2 | Prep time: 10 minutes | Cook time: 15 minutes | Total: 25 minutes

Ingredients:

For noodle bowl:

  • 2 nests of whole wheat noodles
  • 1 Tbsp vegetable oil
  • 2 cloves of garlic, finely chopped
  • 1 small red bell pepper, cut into 2 inch thin strips
  • 1 small head of broccoli, cut into florets
  • Pinch of salt
  • Freshly cracked pepper, to taste
  • 1 small bunch of scallions (spring onions), finely chopped
  • 1 Tbsp lightly toasted white sesame seeds*, for topping

*You may use toasted peanuts too instead.

For sauce:

  • 3 Tbsp peanut butter
  • 1 Tbsp white wine vinegar
  • big pinch of red pepper flakes
  • 2 Tbsp of hot water (or a little more to achieve a thin yogurt-like consistency of sauce)

Directions:

  1. Boil a medium sized pot of water. Add the whole wheat noodles and cook according to the package instructions. Drain and set aside.
  2. Heat a pan over medium high heat. Add oil and sauté  garlic for about 30 seconds. Add red pepper and broccoli to the pan and sauté for another 5 minutes over medium high heat. Season with salt and pepper.
  3. Whisk together all the ingredients for sauce, adding the hot water in increments at the end. You are going for a thin yogurt-like consistency.
  4. Once the noodles are cooked and drained, toss together the noodles, sautéd vegetables and scallions.
  5. Portion into small bowls and top with a generous sprinkling of sesame seeds. Serve immediately.
Share this recipe:

Baked Cinnamon Sugar Pumpkin Doughnuts

Baked Cinnamon Sugar Pumpkin Doughnuts2
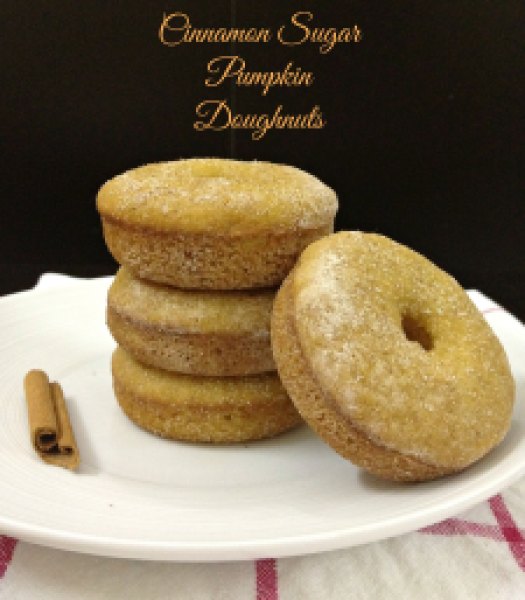
This is my last recipe post for the year and I can not help but write about doughnuts! Yes! Another baked doughnut recipe for you all. I was able to scratch one more thing off my list before bidding adieu to 2013. No, I am not talking about buying a doughnut pan. I am talking about making pumpkin puree from scratch! It was added to the list simply because we don’t get canned pumpkin puree here. Of course the final result was immensely satisfying and rewarding. Pioneer Woman created this easy tutorial light years ago which I followed. Now I have freezer-full of pumpkin puree and no, I am not whining about it! 🙂
These doughnuts are my 2nd favorite after these. Do not close your browser window thinking this recipe is not good enough. These are equally soft, fluffy and gorgeous as my favorite ones. It is just that chocolate always tops my list and cinnamon follows hence the second place. If you want best of both worlds then fold in some dark chocolate chips to the batter. Totally sinful and acceptable! Just saying! 😉
Baked Cinnamon Sugar Pumpkin Doughnuts1
Baked Cinnamon Sugar Pumpkin Doughnuts3
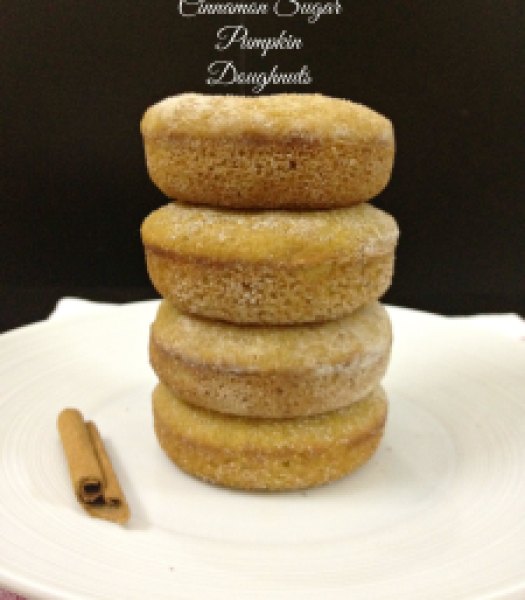
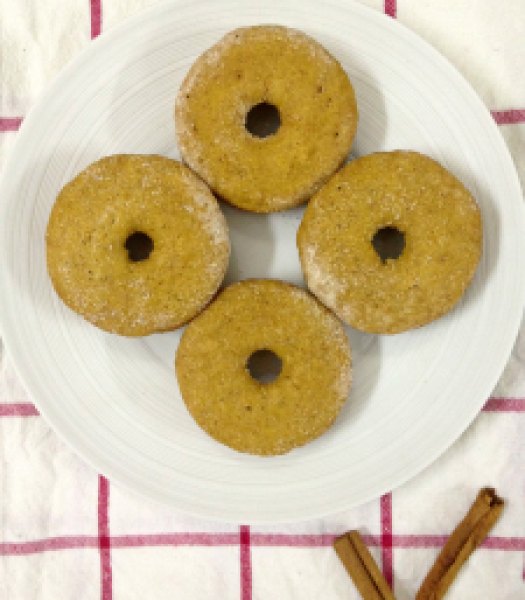
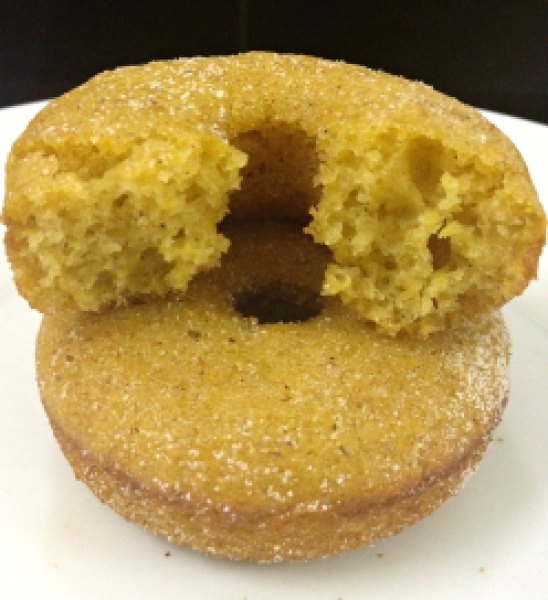
These lovelies are so pillowy, you may want to sleep on them! They are perfectly cakey plus each bite is wrapped in cinnamon. Your house will smell dee-vine! The batter comes together easily in one bowl, without using any mixer. If you don’t own a doughnut pan, here is a good news, you may easily bake them in a muffin-pan!
I am not going to ask you to make them first thing in 2014 ‘IF’ your new-year resolution is to eat healthy as they are not completely low-fat but do indulge in them on your cheat-day as I can guarantee that you’ll absolutely LOVE them without regret!
Baked Cinnamon Sugar Pumpkin Doughnuts4
Baked Cinnamon Sugar Pumpkin Cake Doughnuts
Makes: 12 doughnuts | Prep time: 10 minutes | Bake time: 13 minutes | Total time: 25 minutes
Ingredients:
  • 1 large egg
  • 2/3 cup white granulated sugar
  • 1/4 cup vegetable oil
  • 3/4 cup pumpkin puree
  • 4 Tbsp yogurt
  • 1/2 tsp vanilla extract
  • 3/4 cup + 2 Tbsp all-purpose flour
  • 1 teaspoon pumpkin pie spice
  • 1/2 teaspoon salt
  • 1/2 teaspoon baking powder
  • 1/2 tsp baking soda
For coating:
  • 3 Tbsp vanilla sugar
  • 1 tsp ground cinnamon

Directions:

  1. Preheat the oven at 180ºC/350ºF. Grease the doughnut pan with oil and set aside.
  2. In a medium bowl, whisk together flour, pumpkin pie spice, salt, baking powder and baking soda. Set aside.
  3. In a large mixing bowl, whisk together egg and sugar. Beat in oil, pumpkin puree, yogurt and vanilla extract one by one. Slowly fold in dry ingredients to the wet ingredients. Do not overmix the batter. Mix just until no flour pockets remain.
  4. Carefully spoon the batter to the doughnut pan, filling not more than 3/4th. Bake for 13 minutes. Let cool in pan for about 5 minutes and then invert on the cooling rack.
  5. In a zip-lock bag, combine vanilla sugar and ground cinnamon. One at a time, put the still-quite-hot doughnuts in a bag and shake lightly to cover. Remove from bag and serve! Store in an airtight container at room temperature for 2-3 days.
Share this recipe: