Tag: zest

Chocolate {Whole} Pear Orange Loaf Cake

Happy ‘world chocolate day’ guys! Hope you are celebrating by eating your weight in {dark} chocolate. I also hope you are able to watch chocolatier Willy Wonka in his delicious chocolate kingdom or see Bruce gobble up THE chocolate cake and eating or drinking some chocolate alongside them!

The weather around here has been so pleasant and downright gorgeous past few days. It hasn’t been raining as much as I would like but it’s been cool and breezy. So on one such lovely Sunday evening, I was craving something chocolatey and wanted to bake this delicious Life By Chocolate Cake from the blog archives which is embellished on top with red pear halves and cinnamon but instead decided to bake something new for the blog. I had ripe red pears which were begging to be used so this time I used them pears whole and added orange zest and juice to the mix! It’s a straight forward recipe using simple pantry ingredients except for red pears which are by the way in season right now so go find them before they disappear.

Have a lovely Friday guys!


Print Recipe
Chocolate {Whole} Pear Orange Loaf Cake
Course Cake, Desserts
Cuisine American
Prep Time 20 minutes
Cook Time 55 minutes
Servings
slices
Ingredients
Course Cake, Desserts
Cuisine American
Prep Time 20 minutes
Cook Time 55 minutes
Servings
slices
Ingredients
Instructions
  1. Preheat the oven at 170°C/350°F. Grease the 8×4-inch loaf pan with oil and set aside.
  2. In a large bowl, whisk together whole wheat flour, all purpose flour, cocoa, cinnamon, baking powder, baking soda and salt. Set aside.
  3. In a separate large mixing bowl, whisk together orange zest and cane sugar. One by one, whisk in oil, egg, yogurt and vanilla until completely incorporated. Peel the pears at this stage.
  4. Add dry ingredients to wet ingredients in 3 parts, alternating with orange juice, mixing gently with rubber spatula. Start and end with dry ingredients. Do not overmix. The batter will be thick but if the consistency is too thick to even stir add a splash of orange juice.
  5. Pour the batter in your prepared loaf pan and arrange the four whole pears at the equidistance, pushed in to the batter (as seen in the picture below). Bake for 50-55 minutes or until a toothpick inserted in the center comes out clean or with few moist crumbs. Do not overbake as it may make the final product dry. Let the cake rest in the loaf pan for about 10 minutes before inverting it on a cooling rack. Let cool a bit before slicing. Serve warm with a scoop of vanilla ice-cream or a spoon of plain greek yogurt. The cake stays fresh for 3-4 days in refrigerator when stored in an airtight container.
Share this recipe:

Zesty Peaches & Cream Mini Bundt Cake

Zesty Peaches & Cream Mini Bundt Cake1

Hiya.. I hope you all had a wonderful Independence Day long weekend. Ours was relaxed and lazy and juust perfect. Monday was tough indeed. Today was only bearable because I had this cake in my life. First bite into it and I instantly regretted making a mini version because this was over in seconds!! So to save you from regret I suggest you double the following recipe and make 2 mini bundts! 😉

The combination of orange, peach and cream cheese is blow-your-mind-off-amazing! This mini bundt is supremely moist unlike the dry, crumbly pound cakes we all dread. It turns into a piece of heaven drizzled with the vanilla glaze. Isn’t this mini size so cute! Give this a go before the peach season officially ends.

Enjoy & eat it all up! 🙂


Zesty Peaches & Cream Mini Bundt Cake4


Zesty Peaches & Cream Mini Bundt Cake

Yields: 1 6-inch bundt | Serves: 6 | Prep time: 15 minutes | Bake time: 30 minutes | Total time: 45 minutes

Ingredients:
For Cake:
  • 1/4 cup peach cubes (about 1 medium /2 small peaches, peeled & pitted)
  • 1/2 Tbsp all-purpose flour
  • Zest of 1 Naval orange
  • 1/3 cup sugar
  • 1 large egg
  • 1/4 cup unsalted butter, at room temperature
  • 2 Tbsp cream cheese, at room temperature
  • 2 Tbsp freshly squeezed orange juice
  • 1 tsp vanilla extract
  • 1/2 tsp orange extract
  • 1/2 cup all purpose flour, sifted
  • 1/2 tsp baking powder
  • Pinch of salt

For Glaze:

  • 4 Tbsp powdered sugar
  • 1 tsp vanilla extract
  • 1 tsp milk or cream (add more to adjust the consistency)

Directions:

  1. Preheat the oven at 160°C / 325°F. Grease 6-inch mini bundt pan with oil/butter. Set aside.
  2. Put the prepared peach cubes in a bowl. Sprinkle the peach cubes with all purpose flour. Stir lightly, just until peach cubes are coated with the flour.
  3. In a medium mixing bowl, add orange zest and sugar and rub it together with your fingers to release the natural oils from the zest. Add butter and egg to the bowl. Cream together butter, egg, sugar & zest with the whisk or using hand held mixer. Whisk in cream cheese, orange juice, vanilla and orange extract. Slowly and carefully, mix in all purpose flour, baking powder and salt. Do not overmix.
  4. Fold in the prepared peach cubes to the cake batter and pour the batter in the prepared bundt pan. Bake for 26-28 minutes or until the toothpick inserted in the center comes out clean. Let the cake cool in the bundt pan for 5 minutes before inverting on a cooling rack to cool completely.
  5. For glaze: Combine powdered sugar, vanilla extract and milk, adding a teaspoon of milk at a time until glaze reaches desired consistency.


Zesty Peaches & Cream Mini Bundt Cake2

Share this recipe:

Italian Summer Pasta Salad

 Italian Summer Pasta Salad1


After radio silence for 3 weeks, I’m back. Again. Can’t say for how long but I am here. So how are things guys? Here, monsoon has almost arrived and summer is officially over (for good!). But here I am, with a huge backlog of summer recipes. What am I to do when all these days I have been cooking all things “summery” regularly but not getting time to post them. Let’s just say that it is still summer somewhere in the world, right?! 😉

I love anything and everything Italian so when I came across this pretty looking salad on Sommer’s amazing blog I knew I had to get to it pronto. It is so good and SO refreshing! Zests of orange and lemon, al dente pasta, orange chunks, tiny tomatoes and torn basil all tied together with olive oil and Parmesan cheese. What’s not to love? Must try, whatever time of year it is for you.

I hope you’re having an awesome weekend.
Stay cozy, it’s gonna be a rainy one! xx


Italian Summer Pasta Salad3


Italian Summer Pasta Salad

Recipe scaled down & adapted from A Spicy Perspective

Yield: 2-3 servings | Prep time: 15 minutes | Cook time: 15 minutes | Total: 30 minutes

Ingredients:

  • 2 cups whole wheat Farfalle pasta
  • 1 naval orange, zest and orange segments
  • 1 lemon, zest and juice
  • 2 Tbsp extra-virgin olive oil
  • 1 cup grape tomatoes, halved
  • 1/4 cup scallions, cut into 1 inch segments
  • 1/4 cup torn basil leaves
  • 3 Tbsp shaved Parmesan cheese
  • Salt and pepper

Directions:

  1. Place a large pot of salted water over high heat. Bring to a boil and cook the pasta according to package instructions. Drain the pasta and set aside to cool.
  2. Meanwhile, zest the orange and lemon. Place the zest and the juice of lemon in a large bowl. Add the olive oil and whisk. Peel the orange, gently break the segments apart and seed them. Place them in the bowl.
  3. Slice the tomatoes in half and add to the bowl. Then pour the drained pasta over the tomatoes and gently toss to coat. Add the scallions and basil leaves to the bowl and toss. Salt and pepper generously, about 1/2 tsp salt and 1/8 tsp pepper. Refrigerate until ready to serve.

Note: I didn’t have scallions at hand so I had to skip them but they are highly recommended as it’d add some crunch & make the dish all the more flavorsome. 🙂


Italian Summer Pasta Salad2

Share this recipe:

Baked Lemon Doughnuts with Lemon Cream Cheese Glaze ~ Eggfree

Baked Lemon Donuts with Lemon Cream Cheese Glaze1


Hello folks! April went by at a lightening speed. It was a total blur. A beautiful blur at that. Yes, I absconded again for the latter part of April. Well, I hope you didn’t miss me much. Sorry to say but I didn’t miss you guys one bit. Here is why. These past days were spent with my most beautiful angelic cutie pie tiny-little-peanut-sized-newborn-niece. She turned 12 days today. We feel so blessed to have her in our lives and welcomed her in to this world with lots of snuggles and baby talks. We immediately named her Cherry (lovingly, of course!) because trust me when I tell you this, she looks just like a ruby red cherry. She is such a doll, so adorable, so so precious. All the sleepless nights spent in soothing her back to sleep were totally, absolutely worth it. I’m back home now and miss her so so much.

The moment I returned home, I had to bake. To celebrate. I instantly thought donuts! I mean, come on, donuts=celebration. Summer is not treating us Bangaloreans well this year and lemons are always on my mind. Big, plump, juicy, organic, tart yet sweet lemons from my parents-in-law’s lemon tree. They are simply THE best. So lemon donuts it was. They turned out so amazing that the next day I made them again. This time around I doubled the recipe and baked it as an 8-inch single layer cake for my parents-in-law’s wedding anniversary. So if you don’t own a donut pan, buy one ASAP! These little things are addicting! For now, simply bake them as mini cupcakes or just double this recipe to get a cake.


Baked Lemon Donuts with Lemon Cream Cheese Glaze3


The recipe is simplicity at its best. Almost refined sugar free. No eggs required. No mixer needed. Just one bowl and a whisk is all you need to make the sun shine brightest! You can even prepare the glaze in the same mixing bowl. I am always happy with less dishes and lesser clean up. So in these donuts, moisture is being imparted by buttermilk and oil. Honey shoulders the responsibility of lending sweetness. Truly ordinary ingredients create this extra-ordinary treat. These baked donuts are light, fluffy and just lemony which doesn’t make you pucker!

These donuts are then topped with lemon cream cheese glaze. The glaze is a perfect accompaniment for the donuts. Again, just lemony and just sweet. Decorate them with a sprinkle of yellow colored sanding sugar. Vibrant, just like our little one.

So celebrate life and all things nice with these lemon glazed donuts!


Baked Lemon Donuts with Lemon Cream Cheese Glaze4


Baked Lemon Doughnuts with Lemon Cream Cheese Glaze ~ Eggfree

Makes: 6 | Prep time: 15 minutes | Cook time: 10 minutes | Total: 25 minutes

Ingredients:

For donuts:
  • 3/4 cup + 2 Tbsp all-purpose flour
  • 1/4 tsp baking powder
  • 1/4 tsp baking soda
  • 1/4 tsp salt
  • 1 Tbsp white granulated sugar
  • 1 Tbsp lemon zest
  • 1/4 cup honey
  • 3 Tbsp oil
  • 1/3 cup buttermilk
  • 1/2 tsp vanilla extract
  • 2 Tbsp lemon juice (lemon enthusiasts may use 2.5 to 3 Tbsp)

For glaze:

Following measurements can glaze about 10-12 donuts.

  • 100 gm (3.5 oz) cream cheese, room temperature
  • 1 tsp lemon zest
  • 1 Tbsp lemon juice
  • 1/4 cup icing sugar, sifted
  • Yellow colored sanding sugar, to decorate

Directions:

  1.  Preheat the oven at 180ºC / 350ºF. Grease 6-count donut pan with oil. Set aside.
  2. In one bowl, whisk together flour, baking powder, baking soda and salt. Set aside.
  3. In a mixing bowl, add sugar and lemon zest and rub together with finger to release oils from the zest. Whisk in honey, oil, buttermilk, vanilla extract and lemon juice until the mixture formed is completely smooth.
  4. Slowly whisk in dry ingredients into wet ingredients until just combined. Do not overmix. Divide the batter among prepared donut pan and bake in the preheated oven for about 8-9 minutes or until a toothpick inserted in a center comes out clean. Cool in the pan on a cooling rack for 5 minutes. Then carefully turn out doughnuts directly onto rack to cool completely.
  5. Glaze: Whisk together cream cheese, lemon zest, lemon juice and sifted icing sugar to form a smooth consistency. Dip completely cooled donuts one by one into a bowl of glaze and place back on a cooling rack. Sprinkle with yellow sanding sugar just before serving as the colors will bleed. Donuts will keep in an airtight container for 2-3 days stored in a refrigerator.

*You will have little cream cheese glaze leftover which is never a bad thing in my book. You may lick with spoon or store it in refrigerator for 3-4 days. Give the glaze a good whisk before using on baked goods.
*Double the donut recipe and bake it in an 8-inch cake tin. Bake for about 20-23 minutes.
*To make this recipe vegan, make your own non-dairy buttermilk. To 1 tsp lemon juice or apple cider vinegar, add 1/3 cup non-dairy milk of your choice . Let sit for 15-20 minutes and use as a regular buttermilk substitution.

Share this recipe:

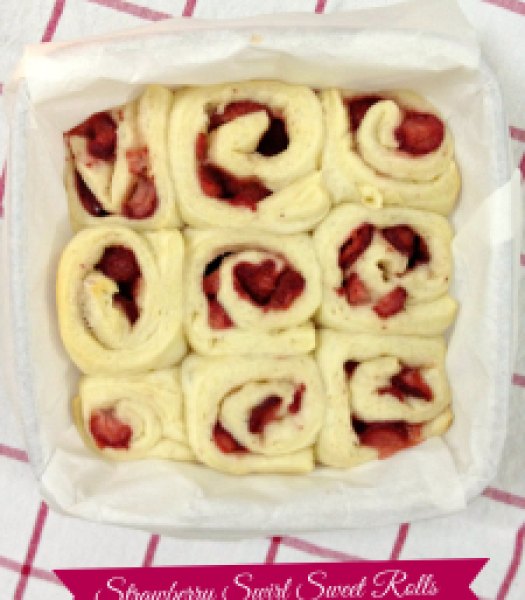
Good Morning with Strawberry Swirl Sweet Rolls

Strawberry Swirl Sweet Rolls1


Heya!

Hope you all had an amazing Christmas & got to spend time with family, friends and your loved ones! I had a fantastic day which started with a breakfast of these delicious Blueberry Pancakes. I used this recipe with the addition of frozen blueberries in the batter. Nibbled on some cheese, chocolate and Fruit Cake which had time to age for more than 3 weeks. Took a walk with hubby. And spent the rest of the day watching Miracle on 34th street & It’s a wonderful life, cozying up in a blanket. It was indeed a wonderful day!

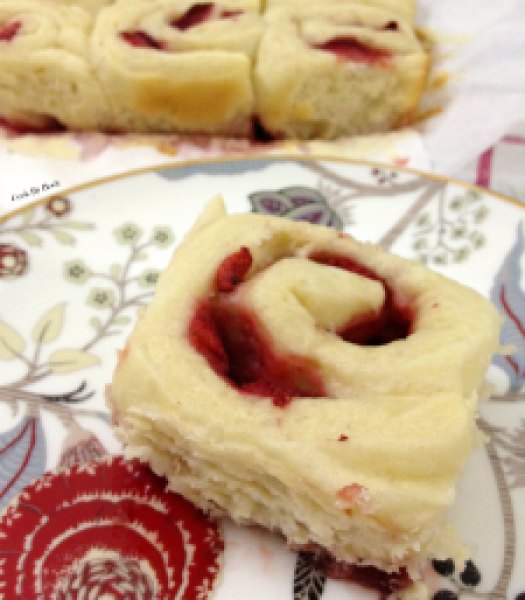
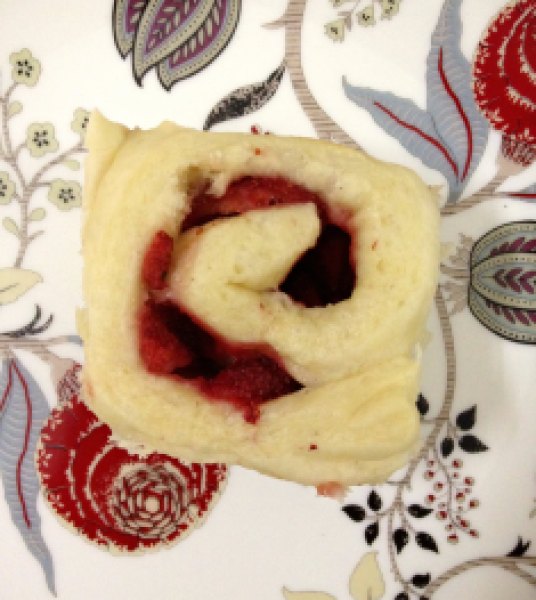
Today I have got you a perfect holiday entertaining recipe. Ring the morning of 2014 with these juicy, sticky and sweet strawberry rolls. They are tender and puffy, utterly soft and buttery. Totally melt-in-your-mouth-experience! Plenty festive too!


Strawberry Swirl Sweet Rolls3


This happened to be a big win for me before the end of 2013. I finally concurred my fear of handling yeast and got these rolls right at first attempt! Woohooo!! They are that easy people! Just read the recipe carefully before starting the prep and follow all the steps, you are halfway there! The wait time of 4 hours is a bit tedious but if you do not have that kind of time at a stretch then you can do all the work at night. After the 1st rise in a warm place, let the rolls rise overnight at room temperature to bake in the morning. That way you don’t have to wait till noon to eat them! Convenient, isn’t it?! 😉


Strawberry Swirl Sweet Rolls2


Double this recipe if you’re serving a larger crowd. You can freeze the extra rolls sans the glaze and reheat them in micro when sweet roll cravings hit. Also, I do not have pictures with the glaze but it is absolutely necessary to top these with glaze. Okay, it is up to you to decide (Nope, glaze is MUST!). Not that I am pushy but the glaze makes them sweeter and better!

Happy Holidays!!!
Enjoy!!

Strawberry Swirl Sweet Rolls

Recipe & preparation minimally adapted from Food & Wine

Servings: Makes 9 rolls | Prep time: 30 minutes | Bake time: 25 minutes | Total time: 4 hours 30 minutes

Ingredients:

DOUGH

  • 1/2 cup milk
  • 1/3 cup white granulated sugar
  • 3/4 Tbsp instant dry yeast
  • 1/4 cup unsalted butter, softened to room temperature
  • 1 large egg
  • 1/2 tsp grated lemon zest
  • 1/4 tsp salt
  • 2 and 1/4 cups + 2 Tbsp all-purpose flour, plus more for dusting/rolling

FILLING

  • 3/4 cup frozen strawberries, sliced thick (NOT thawed)
  • 1 tsp grated lemon zest
  • 3 Tbsp white granulated sugar
  • 1/2 tsp cornstarch

GLAZE

  • 1/2 cup confectioners’ sugar
  • 1 and 1/2 Tbsp cream/milk

Directions:

  1. MAKE THE DOUGH: In a small saucepan, warm the milk over low heat until warm (No need of using thermometer but about 95ºF). Pour the warm milk into the bowl of a stand electric mixer fitted with the dough hook and manually stir in the sugar and yeast. Let stand until the yeast is foamy, about 5 minutes. Add the softened butter, egg, zest and salt. Scrape down the sides and manually stir as needed. Gradually add flour and beat at medium speed until a soft dough forms. Increase speed to medium-high and beat until the dough is soft and supple, about 10 minutes longer. *If you do not have a stand-mixer with a hook attachment, knead the dough by hand in this step.Transfer the dough to a lightly floured surface and knead it with your hands for about 2 minutes. *You may add little more flour if the dough is still too sticky to handle at this point. Form the dough into a ball and transfer it to a lightly greased bowl. Cover the dough and let sit in a warm place until doubled in size, 1 to 2 hours.

    Line the bottom of a 8×8 inch baking dish with parchment paper,leaving room on the sides. Turn the dough out onto a lightly floured work surface and, using a rolling pin, roll into a 10×14 inch rectangle. I used a ruler for accuracy. Make sure the dough is smooth and evenly thick, even at the corners.

  2. MAKE THE FILLING: In a medium bowl, toss the frozen strawberries slices with the lemon zest, sugar and cornstarch. Spread the cold sugared strawberries evenly over the dough. Tightly roll up the dough to form a 14-inch-long log. Cut into 9 even rolls (about 1.5 inches in width each). Arrange them in the prepared baking pan, cut sides up. Cover the rolls and let them rise in a warm place until they are puffy, about 2 hours. The berries will release their juice at the bottom of the pan – this is OK.
  3. Preheat the oven to 200ºC/400ºF degrees. Cover the rolls with aluminum foil and bake for about 20 minutes covered and 5 minutes uncovered, until they are golden and the berries are bubbling. Transfer the pan to a rack to cool for about 15 minutes.
  4. MAKE THE GLAZE: In a small bowl, whisk the confectioners’ sugar and cream/milk until smooth. Add more sugar or cream, depending how thick you want the glaze. Pour glaze over the rolls and serve warm.

*Make Ahead: During the second rise, cover the sliced rolls and let sit overnight at room temperature before baking. Baked rolls sans glaze can be frozen up to 2 months and warmed up to enjoy at a later date. Glaze right before serving.

Strawberry Swirl Sweet Rolls4

Share this recipe: