Tag: Whole-wheat flour

Whole Wheat Cinnamon Buttermilk Waffles

Weekends to me are for leisurely breakfast with a pot of coffee. English breakfast and pancakes are my absolute favourites, followed by waffles. To be honest, I love waffles equally but finding a decent place in the neighbourhood which serves healthy and low-calorie waffles is far more challenging than I thought. On top of all the calories you seem to pile on and money you spend, hardly any place seem to get the texture even remotely right so there goes my weekend mojo and moolah. Ha! So one fine day, husband decided to surprise me with a waffle maker. Ta-da! Problem solved (We own this model but it’s out-of-stock on Amazon at the moment, for other options see ‘shop the recipe’ section below the recipe section). 

Bazillion waffle combinations here I come! Breakfast, meal or dessert; using whole wheat, oats or sorghum flour; topped with fried/pached eggs, cheese, mango, berries, Nutella, maple syrup or ice cream; well you get the idea. ENDLESS POSSIBILITIES! It’s truly such a versatile piece of equipment you could invest into, to up the delicious quotient of your weekend brunch situation.

Just like all the recipes on this blog, this recipe could not have been simpler. Definitely groggy eyes and child friendly. Addition of brown butter is an extra step but lends such a great depth of flavour and your kitchen will smell fantastic. And if you don’t want to do the extra step to brown the butter (if that’s even possible!), replace it with a healthier substitute – extra virgin coconut oil. All other ingredients are usual pantry staples. These waffles have crispy exterior and soft interior, just how perfect waffles should be. So what are you waiting for?

Go on and have a lovely weekend. ✨

Print Recipe
Whole Wheat Cinnamon Buttermilk Waffles
A simple recipe using pantry staples. These waffles have crispy exterior and soft interior, just how perfect waffles should be!
Cuisine American
Prep Time 10 minutes
Servings
waffles
Cuisine American
Prep Time 10 minutes
Servings
waffles
Instructions
  1. Do this step if you're using brown butter - Heat a pan on a medium-low heat and add butter. Let the butter melt, once the water from it evaporates it will begin to brown. Keep an eye on it as it browns quickly. The butter will begin to smell nutty. Remove from the heat and immediately transfer the browned butter to a small bowl. Let cool for 5 minutes.
  2. In one bowl, whisk together whole wheat flour, cornstarch, baking powder, baking soda, cinnamon and salt.
  3. In a liquid measuring jar, whisk in egg, cane sugar, brown butter/olive oil, buttermilk and vanilla, in this same order.
  4. Make a well in the center of dry ingredients and add liquid ingredients to it. Stir together using silicon spatula until well combined. Do not overmix.
  5. Make waffles as per the manufacturer's instructions of your waffle maker. Serve immediately topped with seasonal fruits and a drizzle of maple syrup.

Shop the recipe:

Here are some items I used to make today’s recipe.


Some of the links above are affiliate links, which pay me a small commission for my referral at no extra cost to you! Thank you for supporting Cook By Book.

Share this recipe:

Baked Banana Donuts & Fresh Strawberry Cream Cheese Frosting ~ Healthier & Eggfree

Banana Donuts1
Wow… It’s been  3 weeks since my last blog-post! I’ve really missed you guys. If you follow me on Instagram then you know of my shenanigans. Past 3 weeks were spent vacationing leisurely in beautiful Goa and finishing some important paperwork back home. If you don’t follow me there then you’ve missed out on some amazing pics of sunsets and not-to-be-missed eateries in Goa so I’d suggest you tap that blue button right away! We had a fabulous time spending our 5th wedding anniversary, relaxing and lazying around on beach. It had been ages (more than a year!!) since we took our last vacation (just us) so this 10 days break was much appreciated. But my sun-burnt self is definitely glad to be back and you’re going to love this recipe I have for you!
After our holiday to the tropics, I recreated the scene in the comfort of our home and made these uh-mah-zing banana donuts. Oh and I didn’t serve them alone. Oh yeh! These are topped with fresh strawberry cream cheese frosting. Yes, it is 2 recipes in 1 blog-post kinda day today. Anyway I can compensate my absence on this space 😉
Banana Donuts2
These soft and fluffy whole wheat banana donuts are what dreams are made of! This is a healthier and eggfree version. Brown sugar has been used which used with bananas lends a caramelized depth of flavor. I prefer to use oil instead of butter in most of my cakes and cupcakes. Oil combined with yogurt gives moist and pillowy end product even when whole wheat flour is involved.
And what do I say about the frosting! It is super cool. Spread it on donuts or frost some vanilla or chocolate cupcakes with it. Yes, the recipe below will frost about 12 cupcakes and will frost 12 donuts even more generously with a spoonful or two extra for licking! The frosting naturally is pink without addition of any artificial color and it is flavored with real strawberries and just a bit of strawberry extract. Perfection indeed!
Happy Baking!
xx
Baked Banana Donuts with Fresh Strawberry Cream Cheese Frosting ~ Healthier & Eggfree
Makes : 12 donuts | Prep time: 20 minutes | Bake time: 13-14 minutes | Total time: under 30 minutes

Ingredients:

For donuts:
  • 1 cup whole wheat flour
  • 1 tsp baking powder
  • 1/4 tsp salt
  • 1/4 cup oil
  • 1/3 cup brown sugar
  • 1 + 1/2 cup mashed banana (about 3 large)
  • 6 Tbsp yogurt
  • 1 tsp vanilla extract
For frosting:
  • 2 large strawberries
  • 4 ounce / 110 gm plain cream cheese spread, at room temperature
  • 1 Tbsp butter, at room temperature
  • 1/4 tsp strawberry essence
  • 1/4 tsp strawberry essence
  • 1/4 cup icing sugar, sifted (or more as per preference)

Directions:

  1. Preheat the oven at 180ºC / 350ºF. Grease 12-count donut pan with oil. Set aside.
  2. Sift together flour, baking powder and salt in a bowl. Set aside.
  3. In a medium sized bowl, whisk together oil and sugar until completely incorporated. Whisk in banana, yogurt and vanilla extract.
  4. Gently fold dry ingredients into wet ingredients until no flour pockets remain. Do not over-mix. Divide the batter equally and fill the molds no more than 3/4th. Bake for 13-14 minutes or until toothpick inserted in the center comes out clean. Cool in the pan on a cooling rack for 5 minutes. Then carefully turn out doughnuts directly onto rack to cool.
  5. Preparing frosting: Wash, hull and pat dry 2 large strawberries. Cut them in small pieces and mash them using fork. Add cream cheese spread, butter and strawberry essence to the bowl and whisk using your electric mixer. Add sifted sugar to this mixture and whisk until completely incorporated and frosting is firm. On completely cooled donuts, spread a thick layer of this frosting. The donuts will keep well in refrigerator for 4-5 days.
Share this recipe:

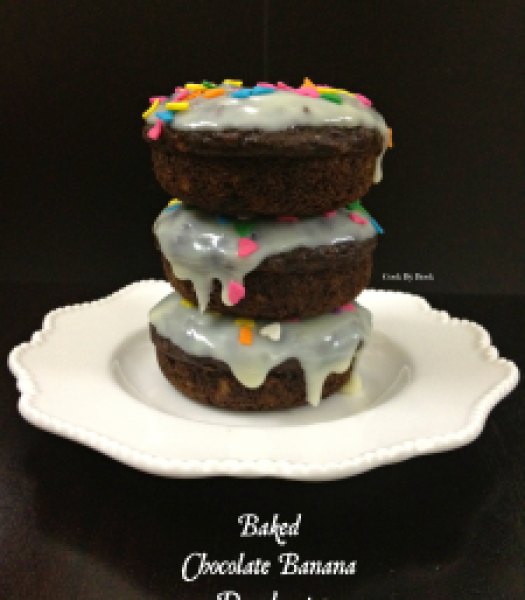
Baked Chocolate Banana Doughnuts ~ Low-fat & Egg-free!

Baked Chocolate Banana Doughnuts1


I pretty much say this about the every recipe I post here but these are the BEST thing ever ever baked in my kitchen! At least so Mr claimed!

These are so moist, soft and super-pillowy. Banana and chocolate heaven in each bite! These baked doughnuts will truly rock your world I tell ya! People with diet-restrictions, this recipe is a MUST in your repertoire!! Such a result without eggs and whole wheat flour… Amazing!

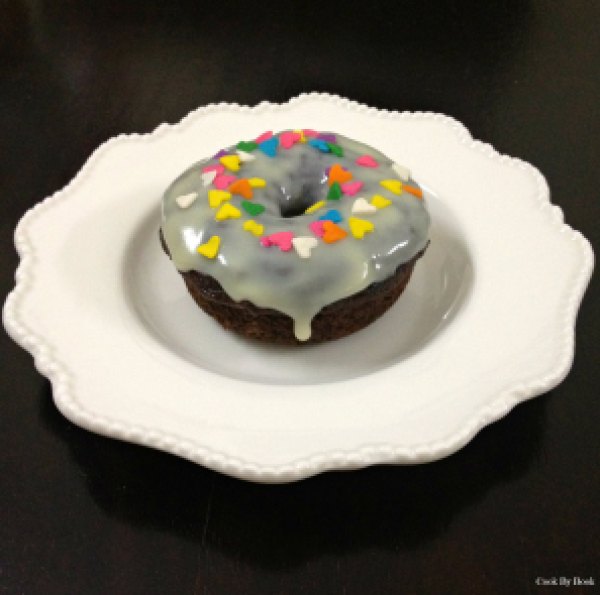
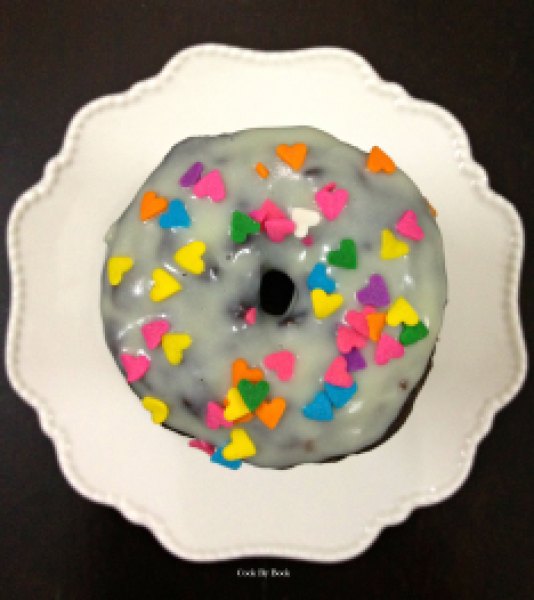
Baked Chocolate Banana Doughnuts3


Baked Chocolate Banana Doughnuts2


And these beauties are then topped with ganache.. A white chocolate ganache.. slurp… It is so gorgeous and I am telling you that this ganache is a MUST for these donuts! I mean who eats a naked donut, right?!!! And then the sprinkles which truly are a NECESSITY! 😀

I shall not endorse it anymore but you gotta try it to believe it! 🙂

Baked Chocolate Banana Doughnuts

Yields: 8 doughnuts

Ingredients:

  • 2/3 cup whole wheat flour
  • 3 Tbsp Hershey’s unsweetened cocoa powder
  • 1 tsp baking soda
  • 1/4 tsp salt
  • 1/4 cup unsalted butter, melted
  • 1/3 cup + 1 Tbsp brown sugar
  • 1 cup mashed very ripe bananas (about 2 medium bananas)
  • 4 Tbsp yogurt
  • 1 tsp vanilla extract

For Ganache:

  • 2 Tbsp medium-fat cream/milk
  • 4 oz white chocolate, coarsely chopped
  • sprinkles, optional

Directions:

  1. Preheat the oven at 180ºC/350ºF. Grease doughnut pan with baking spray. Set aside
  2. Sift together flour, cocoa powder, baking soda and salt in a bowl. Set aside.
  3. In a medium sized bowl, whisk together melted butter and brown sugar. Whisk in mashed banana, yogurt and vanilla extract.
  4. Slowly fold in dry ingredients into wet ingredients. Divide the batter equally and fill the mold no more than 3/4th. Bake for 11-12 minutes. Cool in pan on a cooling rack for 5 minutes. Then carefully turn out doughnuts directly onto rack to cool.
  5. Preparing ganache: In a microwave safe bowl, heat the cream for 40-60 seconds. Fold in chopped white chocolate and mix till it melts completely. Dip cooled doughnuts one by one into bowl of ganache and place back on a cooling rack. Top with sprinkles and serve. Doughnuts will keep in an airtight container for 2-3 days.

*In ganache reccipe, white chocolate may be substituted with dark chocolate.

Share this recipe:

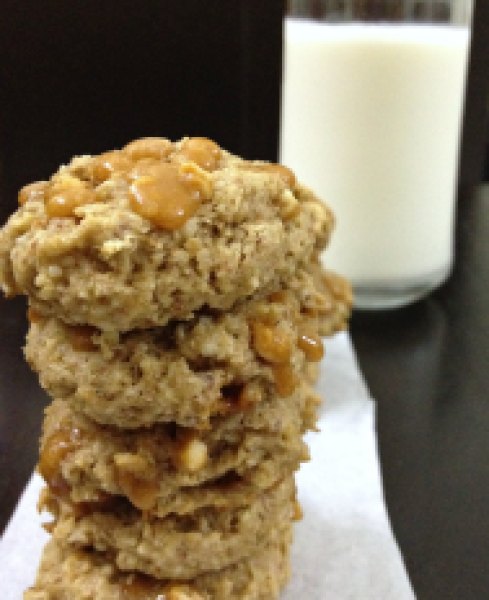
Breakfast just got better! ~ Banana Almond Butterscotch Chip Cookies

Banana Almond Butterscotch Chip Cookies1

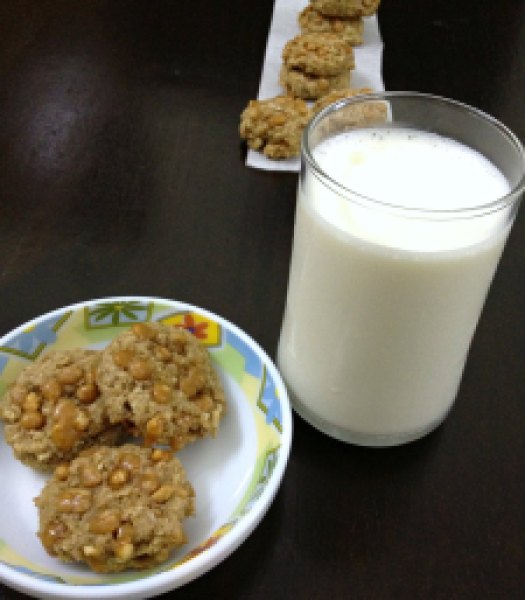
Oh yes! Your breakfast just got a whole lot better with these cookies in your life! Made with the goodness of almonds, oats and whole wheat. So gooey because of the melted butterscotch chips! Deee-vine!

Banana √ Almonds √ oats √

Cookies taste best with a glass of Milk so √ 😉

What more you need for breakfast!

They are so soft and tender because of bananas, you will hardly notice the cookies are egg-free! Hence  perfect for non-egg-eaters too! √ that!

So simple to make that it will be ready in 25 minutes flat! Yes, no need to chill the dough in refrigerator. We are going to use chilled mashed banana for cookie-dough. Just mash the banana nicely with the help of fork and refrigerate for half an hour before using… That’s it! No waiting before baking! It rhymes.. LOL… I know I’m such a crack-pot! 😛

Banana Almond Butterscotch Chip Cookies2

So not that these require any coaxing but promise me you’ll make them!

Banana Almond Butterscotch Chip Cookies

Prep time : 15 mins | Baking time: 10 mins

Yields: 15-16 cookies

Ingredients:

  • ½ cup almonds, ground
  • ½ cup whole wheat flour
  • ¼ cup plus 1 Tbsp soft-rolled oats
  • ½ tsp baking powder
  • ½ tsp baking soda
  • Pinch of salt
  • 2 Tbsp butter, at room temperature
  • 4 Tbsp light brown sugar
  • 1 banana, mashed and chilled (1/3 cup approx)
  • ½ tsp almond extract
  • ¼ cup butterscotch chips, plus more for topping (optional)

Directions:

  1. Preheat the oven to 180°C / 350°F. Line a baking sheet with parchment paper.
  2. In a small bowl, whisk together ground almond, wheat flour, oats, baking powder, baking soda and salt.
  3. In a separate bowl, cream together butter and sugar. Add banana puree and almond extract to it and whisk.
  4. Slowly fold in dry ingredients to wet ingredients and mix till flour pockets have disappeared. Fold in butterscotch chips.
  5. Drop 1 Tbsp of cookie-dough onto a baking sheet at 1-2 inches apart. Bake for 9-10 minutes. Mine were ready in 10 minutes. Let it cool on baking sheet for 2-3 minutes and then transfer on a cooling rack to cool completely. At first, the cookies will be soft in center but will firm up once cool.

*Store them in an air-tight container for 3-4 days at room temperature.
*You can replace butterscotch chips with any other nuts or chocolate chips too!


Share this recipe:

Vanilla Buttermilk Eggless Sponge Cake

Vanilla Buttermilk Eggless Sponge-2

After the last post of SugarPlum Cinnamon Buttermilk Cake, many people wanted an eggless sponge cake. I knew I had to bake one immediately… hence this post.

This recipe is from my initial baking days… very simple and easy to make even for beginners… so naturally it never got posted on the blog. Not bragging but I thought it to be too simple to be posted here. But trust me, it is every bit delicious! This is my go-to recipe while baking for non egg-eaters and it has turned out perfect every single time so it is tried, tested and tasted recipe in a true sense!

Use this as your basic cake recipe and add any other ingredients you like to it. Cinnamon, chocolate, lemon… anything! Sky is truly a limit. Use any other fruit you like or even better, make it tropical (pineapple and coconut, anyone?) style! Getting ideas?! ?

This eggless sponge is moist, has tight crumb and relatively flat top which makes it perfect for a multi-layer cake for birthdays or for any other occasion. In past, I have successfully doubled and tripled this eggless sponge recipe to make a 2 or 3-layer celebratory cake. For frosting ideas and recipes, read the recipe notes at the end of this post.

Vanilla Buttermilk Eggless Sponge Cake-1

Previously I have always used fresh strawberries for this eggless sponge as seen in the picture above. This time I had Kiwi fruit on hand so I decided it was time for a change. I am not a fan of baked Kiwi fruit so I refrained from adding fruit pieces to the batter which I sometimes do with strawberries but if you have no such qualms then go ahead.

It is perfect for eating any time of the day!

Yup, even for breakfast!

It has yogurt and fruit! Totally acceptable, right?! 😉

Kiwi Buttermilk Cake - Eggless1


Recipe adapted from here

Print Recipe
Vanilla Buttermilk Sponge Cake ~ Eggless
Cuisine American
Prep Time 10 minutes
Cook Time 30 minutes
Servings
slices
Ingredients
Topping
Cuisine American
Prep Time 10 minutes
Cook Time 30 minutes
Servings
slices
Ingredients
Topping
Instructions
  1. Preheat the oven to 180°C/350°F. Spray a 6 or 8-inch baking dish with vegetable oil and line the bottom with parchment paper.
  2. Sift together flour, baking powder, baking soda and salt in a bowl.
  3. In a separate bowl, cream together butter, oil and sugar with electric mixer or hand whisk. Whisk in vanilla extract.
  4. Using rubber spatula, gently stir in dry ingredients to the wet ingredients in 2-parts alternating with yogurt/buttermilk, ending with dry ingredients. Do not over-mix the batter.
  5. Spoon the batter in a baking dish and smooth out the surface with the back of spoon. Top with Kiwi/strawberry slices and sprinkle with sugar. Bake for 25-30 minutes or till the toothpick inserted in the center comes out clean.
Recipe Notes

*Stays fresh for 3-4 days if refrigerated in an airtight container.
*Want to add fruit within the cake batter instead on top? Mix together about 1/2 generous cup of chopped fruit and 1 Tbsp flour, fold into the cake batter.
*You may double/triple/quadruple the recipe to make layers for a multi-layered cake. Use vanilla bean buttercream, fresh strawberry cream cheese frosting, lemon cream cheese frosting or coconut buttercream frosting recipe to decorate.

Share this recipe: