Tag: Vanilla

Orange Cherry Baked Donuts ~ Eggfree, Low-fat

Oh hello donuts! How I missed thee. I baked these lovely orange cherry donuts couple weeks ago and because it’s been way too long since I baked any donuts, you can imagine my excitement.

Life here has been a bit of mumbo jumbo lately and I am falling short of words on how to describe my current disposition so instead let’s talk about the awesomeness that these donuts are. Summer (or any season for that matter) makes me crave citrus desserts and if you know me you know I prefer lemony desserts over chocolate almost every single time. Don’t get me wrong, I absolutely love chocolate and there are times when nothing else will do. But on most days, I crave lemon and orange comes close second.

The combination of orange and fresh cherries is just sublime. A delicate cake bursting with orange zest and citrusy notes, soft and pillowy, with a piece of cherry in each bite to make you swoon. The ingredient list is short with no funky stuff and the method no fuss. The recipe doesn’t even call for any oil or butter, isn’t that awesome? Yogurt and orange juice lends soft and fluffy interiors to these donuts. You can have them ready under 30 minutes flat, totally foolproof! You could totally make the recipe vegan by using vegan yogurt. Win-win for all!

So don’t wait until weekend to bake these. Get on them now! ?

Print Recipe
Orange Cherry Baked Donuts ~ Eggfree, Low-fat
The combination of orange and fresh cherries is just sublime. A delicate cake bursting with orange zest and citrusy notes, soft and pillowy, with a piece of cherry in each bite to make you swoon.
Course Desserts, Donuts
Cuisine American
Prep Time 10 minutes
Cook Time 15 minutes
Servings
donuts
Ingredients
Course Desserts, Donuts
Cuisine American
Prep Time 10 minutes
Cook Time 15 minutes
Servings
donuts
Ingredients
Instructions
  1. Preheat the oven at 180ºC / 350ºF. Grease 12-count donut pan with oil. Set aside.
  2. In one bowl, whisk together flour, baking powder, baking soda and salt. Set aside.
  3. In a mixing bowl, add orange zest and sugar and rub together with finger to release oils from the zest. Whisk in yogurt, orange juice and vanilla extract until the mixture formed is completely smooth.
  4. Slowly fold in dry ingredients into wet ingredients using rubber spatula until just combined. Do not overmix.
  5. Arrange 3 pitted, fresh cherries in each mould of the donut pan. Do this for 9 moulds. Divide the batter among 9 donut moulds (let 3 moulds empty). Be careful not to overfill the moulds, 3/4th would be just fine.
  6. Bake in the preheated oven for about 12-15 minutes or until a toothpick inserted in a center comes out clean. Let cool in the baking pan over a cooling rack for 5 minutes. Then carefully turn out doughnuts onto the rack to cool completely. Tastes best the next day, chilled in the refrigerator. Keeps well 3-5 days stored in an airtight container in refrigerator.
Recipe Notes

Don't own a cherry pitter? No problem, a chopstick will do the job! ?

Shop the recipe:

Here are some items I used to make today’s recipe.


Some of the links above are affiliate links, which pay me a small commission for my referral at no extra cost to you! Thank you for supporting Cook By Book.

Share this recipe:

2-layer Pure Vanilla Cake ~ 1st Blogversary!!!

2-layer Pure Vanilla Cake1


Cook By Book in numbers:

– 500+ blog subscribers via email
– 140 on WordPress
– 160+ on Twitter
– 385+ on Instagram
-102 blogposts

My blog officially turns 1 today! Woohoooo!! Last year today I created and set up this blog and published my first blog-post the next day. For about 2 months before starting this space, I used to publish my recipes and pictures on my Facebook page but later I realized I wanted to share more than just a picture and a recipe with you all, in a more customized manner. That’s how this blog was born. It feels just like yesterday but time really flies when you blog. Blogging has taught me so much. Food photography and food styling is what I’ve become totally obsessed with! It is such a great way to connect with like-minded people all around the world and learn about their culture through food. I have made some awesome new friends!

I owe it all to you gorgeous readers! Thank you for making this past year so fulfilling, from having less than 5 to 500+ followers and many more on social media, I’m very grateful for all the support and love so far. Whether it is just a comment, an email or a follow, I want to thank you for all the amazing gestures that has made blogging so so incredible for me!


2-layer Pure Vanilla Cake2


I’m so so so happy, totally in celebratory mood! Throwing a party kinda mood. When I’m happy, I bake. So I baked a cake for this virtual party. It’s a party essential after all. Also, it is neither healthy nor low-fat. It’s buttery, sugary deliciousness. Pure vanilla goodness completely covered in pink whipped cream frosting. Yes! Today I’m sharing a classic vanilla cake which is sturdy in layer-cakes but moist and tender at the same time. A cake you can always depend upon. Make this your go-to recipe for anytime layer-cake requirements. Birthdays, Anniversaries or Weddings. An all-occasion versatile cake.


2-layer Pure Vanilla Cake3


I am no professional at frosting/decorating cakes but I’ve tried my best! Also, I did not have time to make frosting from scratch so I used packaged instant whipped cream, flavored it with 1/2 tsp vanilla extract and colored it with a drop of pink food color. It tasted pretty good too. I hope you enjoy this cake as much as I, husband, a friend, neighbors and my house-help enjoyed! Yes, I believe in sharing the goodness. Always! 🙂

2-layer Pure Vanilla Cake

Makes: 2 7-inch layers | Prep time: 20 minutes | Bake time: 30-35 minutes | Total time: 1 hour

Ingredients:

  • 2 cups all-purpose flour
  • 1 tsp baking powder
  • 1/4 tsp salt
  • A little less than 1/2 cup unsalted butter, at room temperature (about 100 gm)
  • 1 and 1/4 cups white granulated sugar*
  • Seeds scraped from 1/2 vanilla bean
  • 2 tsp vanilla extract
  • 2 large egg whites
  • 1 cup milk

*If you like your baked goods on a sweeter side, use 1 and 1/2 cups sugar instead.

Directions:

  1. Preheat the oven at 170ºC / 340ºF. Butter and flour two 7-inch (5-inch or 6-inch works too) baking pans and set aside.
  2. In a bowl, sift together flour, baking powder and salt. Set aside.
  3. In a bowl of your electric mixer, beat butter and sugar together until pale and creamy, about 3-4 minutes. Add vanilla bean seeds, vanilla extract and egg whites and mix until smooth.
  4. Add dry ingredients to the wet ingredients alternating with milk, beginning and ending with dry ingredients.
  5. Gently stir all ingredients until well combined. Stop mixer and scrape down sides and bottom of the bowl, making sure to have all ingredients mixed well.
  6. Divide batter among baking pans and bake for about 30-35 minutes or until a toothpick inserted in a center comes out clean. Remove and let cool slightly in baking pans for about 5 minutes, then invert on a wire rack and let cool completely.
  7. Frost cakes as desired. Use this Vanilla Bean Frosting recipe and instructions on how-to-frost-a-layered-cake. I colored the frosting with a drop of rose pink food color.

Note: If cakes are baked in 6-inch baking pans, you may cut them so that you have four layers altogether and if cakes are baked in 5-inch baking pans, you may cut them so that you have six layers altogether. This way you can make 4-layer or 6-layer cake using the same recipe.

Share this recipe:

Funfetti Cookies & Cream Ice-cream

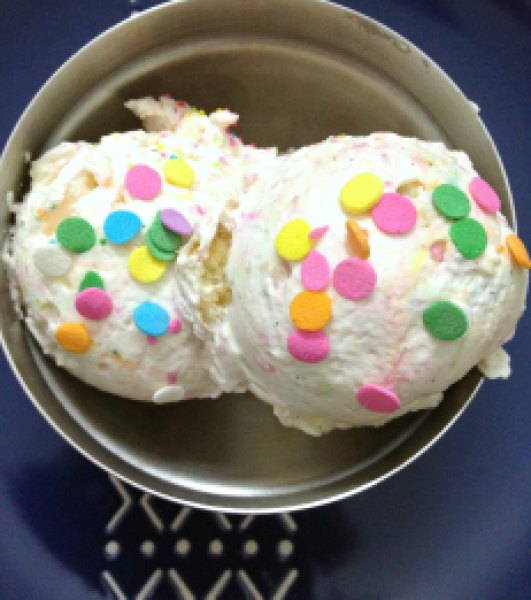
Funfetti Cookies & Cream Ice-cream1

TGIFF! Thank-God-It’s-Funfetti-Friday! 😉

I’m calling out to all ‘sprinkle-on-everything-makes-everything-taste-better’ followers!

Yup… An ice-cream, inside-out filled with sprinkles, is what you are going to get today!

Truly a treat! For your eyes and your palate! ✿◕‿◕✿

Plus, it has cookies in it! ‘I-never-met-a-cookie-I-didn’t-like’ followers, you too join in!

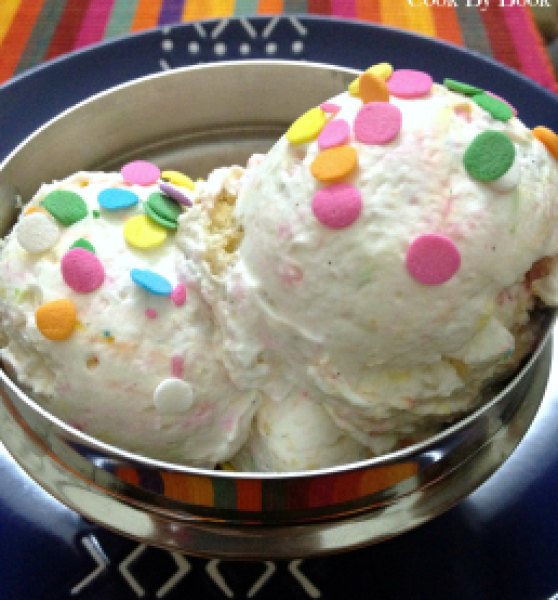
I have used vanilla pod in this ice-cream, not vanilla extract, but it can be used interchangeably. This was my first time using a pod and I have become a fan! The flavor you get is unmatched! I love the black specks you should be able to admire in the picture below.

Not gonna convince you all much, not that it needs convincing!… Just make this and eat! (I pretty much hogged!) 😀

Funfetti Cookies & Cream Ice-cream2


Funfetti Cookies & Cream Ice-cream

Ingredients:

  • 2 cups fresh medium fat cream (40%)
  • 2 Tbsp caster sugar
  • 1 vanilla pod or 1 tsp vanilla extract
  • ¼ cup sprinkles (I used a mix of round and non-perils)
  • 8-10 plain vanilla cream sandwich cookies, crushed

Directions:

Take cream, sugar and vanilla beans/extract in a large bowl and whip till you get a creamy, smooth, fluffy, soft peak consistency. Gently fold in sprinkles and cookies and spoon in airtight container. Freeze away for 4-5 hours. Garnish with more sprinkles while serving. Enjoy!

Share this recipe: