Tag: fresh strawberries

Mango Strawberry Semolina Cake {Eggfree}

I can tolerate summer only because it’s a mango season and I get to eat my weight in mangoes until next summer. It does more harm than good for my waistline but we all have our weaknesses, don’t we? Having said that eaten at right time it has numerous benefits like high in fiber, antioxidants, potassium and Vitamin A to name a few. Having mangoes for breakfast is the best time due to it’s high sugar and calorie content so I usually add them to my morning smoothies and chia puddings and this cake is another way to have mangoes for breakfast with a cup of tea or coffee.

The cake uses semolina for a regular all purpose flour substitute but rises beautifully and has got good crumb. Pairing of mango and strawberry is absolutely divine and one for the books. The cake uses few simple ingredients and mango is the hero here so be sure to use good quality, sweet mangoes for best tasting cake, I have used Alphonso mangoes. The cake batter comes together in minutes and is super easy to whip up even for a novice baker but looks oh-so-fancy because of strawberries on top. It’s an eggfree, vegan recipe which makes it suitable for all kinda palates and diets. So if you are still on a look out for a cake to bake for Father’s day, your dad will be ecstatic with this one.

Happy Father’s Day to all the wonderful fathers! xx


Print Recipe
Mango Strawberry Semolina Cake {Eggfree}
Course Cake, Desserts
Cuisine American
Prep Time 10 minutes
Cook Time 30 minutes
Servings
slices
Ingredients
Course Cake, Desserts
Cuisine American
Prep Time 10 minutes
Cook Time 30 minutes
Servings
slices
Ingredients
Instructions
  1. Grease a round 8-inch cake pan with oil. Preheat the oven at 170ºC/350ºF.
  2. In a small mixing bowl, whisk together fine semolina, baking powder and salt.
  3. In another mixing bowl, whisk together coconut oil, mango purée, castor sugar and vanilla extract.
  4. Gently fold in flour mixture to the wet ingredients until just combined using rubber spatula. Do not over-mix.
  5. Pour the batter in the cake pan. Top with the strawberry halves (cut-side down) in circular fashion and sprinkle raw sugar on top. Bake in the oven for 30-35 minutes or until toothpick inserted in the center comes out clean.
  6. Let cool for 5 minutes on a cooling rack before unmoulding the cake. Serve as is or topped with fresh whipped cream, plain yogurt or vanilla ice cream. Keeps well for 3 days stored in an airtight container in the refrigerator.
Recipe Notes

Feel free to substitute fresh peaches, apricots or cherries for strawberries as per seasonal availability.

Share this recipe:

No Churn Strawberry Cheesecake Icecream


strawberry icecrem-2

Hello everyone,

About 30 months ago, I took a break from blogging to pursue my dream of a Master’s degree in London. After returning to India and back to the nitty-gritty of life, the thought of reviving this space has crossed my mind every single day but I have been lazy procrastinating because Instagram made sure that I was still posting pictures, sometimes even recipes; of all the baked goods and smoothies (my new love) being whipped in my kitchen.

So you may ask why now? Well, there are few recipes which absolutely require they be documented because they’re too legendary to be forgotten as a mere Instagram post. They need to be made multiple times to be shared with your loved ones. Turns out I have accumulated tons of such recipes so it’s about time they get the recognition they deserve. Also, I am not a fan of long Instagram posts so I can’t bear my soul to you guys like I can here on the blog (think long future blog posts, not this though). For now nothing has changed around here as I am still clicking my pictures with iPhone (5s now, ancient I know!) and still want to share good food and things with you all. ❤

I posted a picture of this icecream on my Instagram and Facebook page and got so many requests for the recipe so this is the first recipe I chose to blog about. It’s summer and because last of the strawberries are still gracing the market, I don’t want you guys to not make this recipe at least once! This ice cream is THE BEST I have ever made and doesn’t require churning or icecream maker. It stays creamy and ice-free for about 5 days. The sweetest of strawberries give it an intense berry flavour without adding too much flavouring or colour (you could skip both). So get to it now, quick!


strawberry icecrem-3


No Churn Strawberry Cheesecake Icecream

Yields: 1 litre icecream | Serves: 6-8 people

Hands-on time: 20 minutes | Chilling time: 6-8 hours | Total time: 7-9 hours

Ingredients:

  • 1 cup (250 ml) whipping cream, chilled in the refrigerator (not freezer) at least overnight
  • 1 cup (225 gram) cream cheese, softened at room temperature
  • 1 1/4 cup powdered white sugar
  • Pinch salt
  • 1 tsp vanilla extract
  • 1/4 tsp strawberry extract (optional)
  • Couple of drops pink colour (optional)
  • 1 cup finely chopped fresh strawberries
  • Digestive biscuits, to serve

Directions:

  1. Put one large mixing bowl and whisk of your electric mixer in the freezer for at least 30 minutes. In the chilled bowl, add the whipping cream and whip with the electric mixer on medium high speed until the soft peaks form (about 5-7 minutes). Keep it in the refrigerator till you finish next step.
  2. In another large bowl, whisk together cream cheese and powdered sugar until light, creamy and thick. On a low speed, whisk in pinch of salt, vanilla extract, strawberry extract and pink colour for about 30 seconds. Then whisk in strawberry pieces for another 10 seconds.
  3. Slowly fold in whipped cream to the cream cheese mixture and transfer the icecream mixture to loaf pan. Let it set in freezer for about 8 hours at least. Serve it scooped as is or topped with some digestive biscuit crumbs.
Share this recipe:

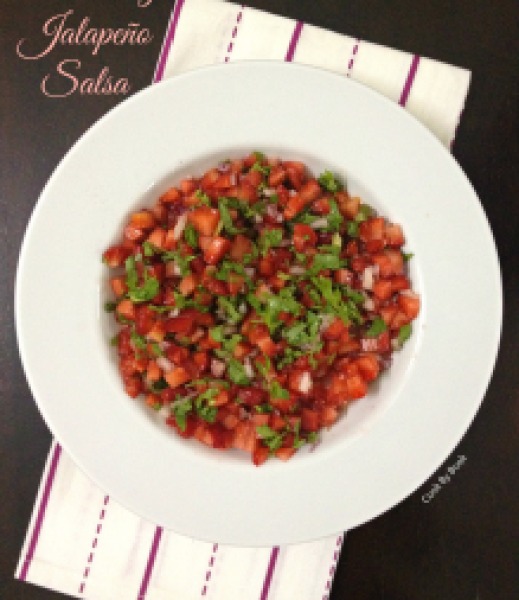
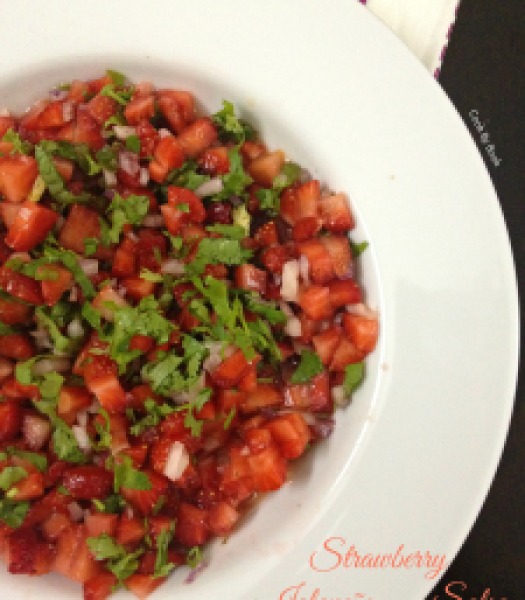
Strawberry Jalapeño Salsa

Strawberry Jalapeño Salsa1


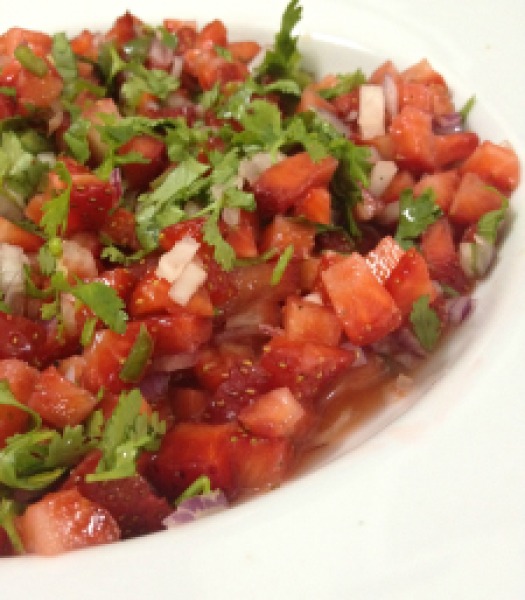
This salsa is so so good. I made it the other night when few friends came over and I knew after the first bite that I had a winner. Thankfully I had clicked few pics beforehand (food blogger problems!) so I decided to make it a post.

Actually, it is quite silly of me to be presenting this as a recipe with strict measurements because, really, you can just chop, drop and taste as you go! So consider this as a rough guideline. You may substitute orange juice in the recipe with lime or make it using pineapple instead of strawberries. Summer on your plate!


Strawberry Jalapeño Salsa3


This recipe here works so perfectly and you can use it on chicken, fish, meats, tacos, bruschetta, or just scoop it up with chips! Pretty versatile. Bring it to a pot-luck or a party and I bet no one has had it before! It is sweet, tangy, spicy and has a lot going on. Strawberries are in abundance right now, so go for it!

Brighten up your Monday with this simple yet cracking dish!
Have a great week ahead! 🙂


Strawberry Jalapeño Salsa2


Strawberry Jalapeño Salsa

Serves: 3-4 | Prep time: 10 minutes

Ingredients:

  • 1 small onion, finely chopped
  • 1 jalapeño pepper, seeds removed and finely chopped
  • Zest and juice from 1 medium orange
  • Around 20 fresh strawberries, chopped into small even dice
  • Fresh cracked black peppers
  • Handful of cilantro, rinsed and finely chopped

Directions:

In a large bowl, let onion, jalapeño, orange juice and zest steep till you prepare strawberries.
Add strawberries, pepper, cilantro and toss. Chill until ready to serve.

Note: Don’t make this much more than an hour or so before serving. Like all salsas, it will wilt and the fruit may get a little mushy. An hour is the optical amount of time for the flavors to meld and the juices to start flowing. Longer than that salsa will slowly start to lose its fresh appearance.

Share this recipe:

Vanilla Buttermilk Eggless Sponge Cake

Vanilla Buttermilk Eggless Sponge-2

After the last post of SugarPlum Cinnamon Buttermilk Cake, many people wanted an eggless sponge cake. I knew I had to bake one immediately… hence this post.

This recipe is from my initial baking days… very simple and easy to make even for beginners… so naturally it never got posted on the blog. Not bragging but I thought it to be too simple to be posted here. But trust me, it is every bit delicious! This is my go-to recipe while baking for non egg-eaters and it has turned out perfect every single time so it is tried, tested and tasted recipe in a true sense!

Use this as your basic cake recipe and add any other ingredients you like to it. Cinnamon, chocolate, lemon… anything! Sky is truly a limit. Use any other fruit you like or even better, make it tropical (pineapple and coconut, anyone?) style! Getting ideas?! ?

This eggless sponge is moist, has tight crumb and relatively flat top which makes it perfect for a multi-layer cake for birthdays or for any other occasion. In past, I have successfully doubled and tripled this eggless sponge recipe to make a 2 or 3-layer celebratory cake. For frosting ideas and recipes, read the recipe notes at the end of this post.

Vanilla Buttermilk Eggless Sponge Cake-1

Previously I have always used fresh strawberries for this eggless sponge as seen in the picture above. This time I had Kiwi fruit on hand so I decided it was time for a change. I am not a fan of baked Kiwi fruit so I refrained from adding fruit pieces to the batter which I sometimes do with strawberries but if you have no such qualms then go ahead.

It is perfect for eating any time of the day!

Yup, even for breakfast!

It has yogurt and fruit! Totally acceptable, right?! 😉

Kiwi Buttermilk Cake - Eggless1


Recipe adapted from here

Print Recipe
Vanilla Buttermilk Sponge Cake ~ Eggless
Cuisine American
Prep Time 10 minutes
Cook Time 30 minutes
Servings
slices
Ingredients
Topping
Cuisine American
Prep Time 10 minutes
Cook Time 30 minutes
Servings
slices
Ingredients
Topping
Instructions
  1. Preheat the oven to 180°C/350°F. Spray a 6 or 8-inch baking dish with vegetable oil and line the bottom with parchment paper.
  2. Sift together flour, baking powder, baking soda and salt in a bowl.
  3. In a separate bowl, cream together butter, oil and sugar with electric mixer or hand whisk. Whisk in vanilla extract.
  4. Using rubber spatula, gently stir in dry ingredients to the wet ingredients in 2-parts alternating with yogurt/buttermilk, ending with dry ingredients. Do not over-mix the batter.
  5. Spoon the batter in a baking dish and smooth out the surface with the back of spoon. Top with Kiwi/strawberry slices and sprinkle with sugar. Bake for 25-30 minutes or till the toothpick inserted in the center comes out clean.
Recipe Notes

*Stays fresh for 3-4 days if refrigerated in an airtight container.
*Want to add fruit within the cake batter instead on top? Mix together about 1/2 generous cup of chopped fruit and 1 Tbsp flour, fold into the cake batter.
*You may double/triple/quadruple the recipe to make layers for a multi-layered cake. Use vanilla bean buttercream, fresh strawberry cream cheese frosting, lemon cream cheese frosting or coconut buttercream frosting recipe to decorate.

Share this recipe: