Tag: cookbybook

Whole Wheat Chocolate Chip Cookies ~ Eggfree & Vegan

Whole Wheat Chocolate Chip Cookies2

A classic whole wheat chocolate chip cookie with a glass of milk! Match indeed made in heaven!

Imagine to be able to have a healthier version of the buttery classic. After receiving rave reviews about Inside Out Chocolate Chip M&M Cookies (Thank you all!), I decided to recreate them into a classic chocolate chip version. I used olive oil instead of butter this time around and skipped milk completely. The result was amazing. I am not claiming these cookies to be skinny or low-fat. They are still 120 calorie each (assuming you get exactly 30 cookies) but you won’t miss the evil fat here, trust me! Come on, olive oil is a good fat and so is whole wheat!

Whole Wheat Chocolate Chip Cookies - 4

Whole Wheat Chocolate Chip Cookies4

If you’re crispy cookie person then flatten the cookie dough a bit more as per your liking and let them bake for an extra minute or so. When baked thick and puffy, these cookies are soft and equally chocolicious. These cookies are also great as ice cream sandwiches. You won’t be able to stop at just one, I know you guys too well! ?

Enjoy & have a gorgeous weekend!

Eeeep… I am off to a road trip and shall share more once I am back! ?

Whole wheat Chocolate Chip Cookies ~ Eggfree & Vegan

Yields: Around 30 cookies | Prep time: 15 minutes | Chill time: 30-60 minutes | Bake time: 14-15 minutes
Ingredients:
  • 3 Tbsp flaxseed powder + 9 Tbsp water
  • 1/2 cup olive oil (coconut oil or unsalted butter can be substituted)
  • 1/2 cup brown sugar
  • 1/4 cup date syrup
  • 2 Tbsp vanilla extract
  • 2 + 1/2 cups whole wheat flour
  • 1/2 Tbsp baking powder
  • 1/2 tsp salt
  • 1 + 1/4 cup mix of dark & milk chocolate chips

Directions:

  1. In a small bowl, mix together flax seed powder and water. Set aside for 10 minutes.
  2. In a medium bowl, sift together whole wheat flour, baking powder and salt. Set aside.
  3. In a large mixing bowl, whisk olive oil and sugar together til completely incorporated. Whisk in date syrup, vanilla extract and flax seed mixture.
  4. Stir in dry ingredients to the wet ingredients to form a dough. Fold in chocolate chips. Chill the dough in refrigerator for about 30 minutes to 1 hour.
  5. Preheat the oven to 160ºC/325ºF. Line the baking sheet with parchment paper. Take about 2 Tbsp of dough, form it into a ball between your palms and flatten them with fingers or a fork. The cookies won’t spread much while baking so flatten how much ever thickness you like. Bake them for 14-15 minutes. Let them cool on baking sheet for 5 minutes before transferring them on cooling rack to cool completely. The cookies will stay fresh for 1 week at room temperature stored in an airtight container.

Shop the recipe:

Here are some items I used to make today’s recipe.


Some of the links above are affiliate links, which pay me a small commission for my referral at no extra cost to you! Thank you for supporting Cook By Book.

Share this recipe:

Cinnamon Stovetop Oatmeal ~ For One

cinnamon stovetop oatmeal -1

You don’t need me tell you how to make an oatmeal. I’m sure, you can handle that on your own.

Maybe I need to remind myself how to make oatmeal. Maybe I need to remind myself to make oatmeal at all… and eat it.. for breakfast. Staring at my laptop first thing in the morning, burning my mouth sipping hot coffee does not make breakfast.

I thought if I needed a reminder, you might need it too. So let’s make this healthy stovetop oatmeal with cinnamon and any seasonal or even frozen fruits of your choice. A treat for that special person, YOU!

Cinnamon Stovetop Oatmeal-2

This oatmeal is perfect for the weather… so comforting and so healthy! The addition of cinnamon is mandatory. You may throw in some nutmeg too. Addition of nuts or seeds not so much but if you do add them, you’ll not regret it. This makes for such a wholesome breakfast in such a short time and hardly demands a ton of ingredients. Water, milk, quick cooking oats and cinnamon – you could manage these everyday, isn’t it? Total no-brainer. Oh, you could also double the recipe to serve two. ?

Have an exciting weekend peeps!

Cinnamon Stovetop Oatmeal – For One

Serves: 1 | Ready under 10 minutes

Ingredients:

  • 1/2 cup water
  • 1/2 cup milk – soy, almond, coconut or cow milk
  • 1/2 tsp ground cinnamon
  • 1 Tbsp cane sugar/honey/maple syrup
  • 1/4 cup quick cooking oats
  • Pinch of salt
  • 1/2 tsp vanilla extract
  • Optional toppings: chopped walnuts, sliced almonds, raisins, cranberries, chia seeds, hemp seeds, pumpkin seeds

Directions:

  1. In a medium saucepan, add water, milk, cinnamon and cane sugar. If using honey/maple syrup read the last step. Turn the heat up to high and bring to a boil. Add the oats and salt and reduce the heat to low. Let simmer stirring occasionally for a minute.
  2. Turn the heat off. Stir in vanilla and honey/maple syrup (if not using cane sugar). Top with fruits or other toppings (mentioned above) of your choice. Serve immediately.

Shop the recipe:

Here are some items I used to make today’s recipe.


Some of the links above are affiliate links, which pay me a small commission for my referral at no extra cost to you! Thank you for supporting Cook By Book.

Share this recipe:

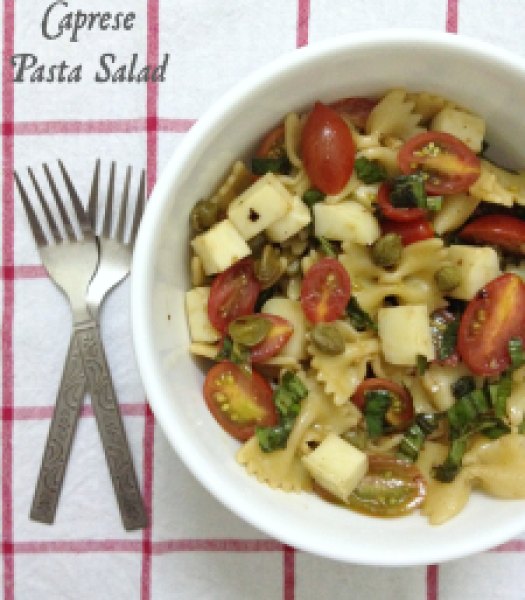
Caprese Pasta Salad

Caprese Salad1


It’s my Mother’s Birthday today! She is the most special woman in my life. She is my first best friend and I have had heaps of special moments with her. She handed down so many traits of hers to me… We both love bags, shoes, clothes and FOOD! She is such an awesome cook!

As already confessed in my intro page, I never learnt to cook before I got married and being such a great cook that she is, my mom was quite concerned about that part. She sincerely wrote down all her recipes in a diary for my convenience and gifted it to me on my D-day. That is my most prized possession and a lovely gesture on my mom’s part! I should soon get down to posting few of her special recipes!

Among many things my mother and I share, we both LOVE pasta! So aptly, I am posting a very simple pasta salad which is very refreshing and flavorful. I’m sure my mom would have enjoyed this thoroughly if I could make this for her at home for tonight’s celebration. But we are distanced by miles hence a virtual birthday dish will have to suffice! 🙁


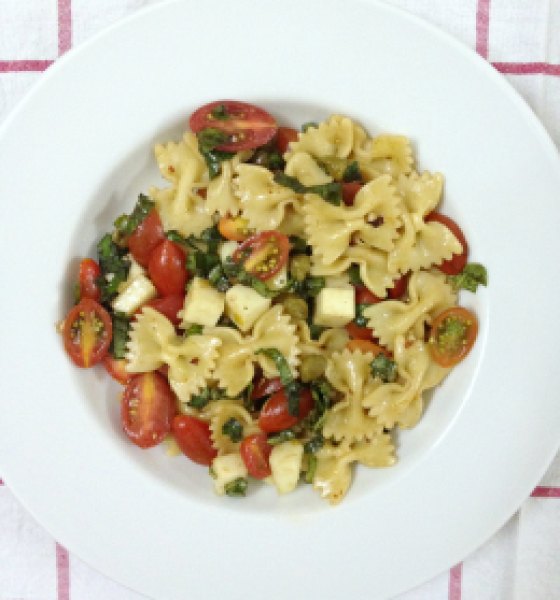
Caprese Salad2


I love Caprese in any and every form!

You must remember I once created this unusual ice-cream with it and these skewers served with pesto!

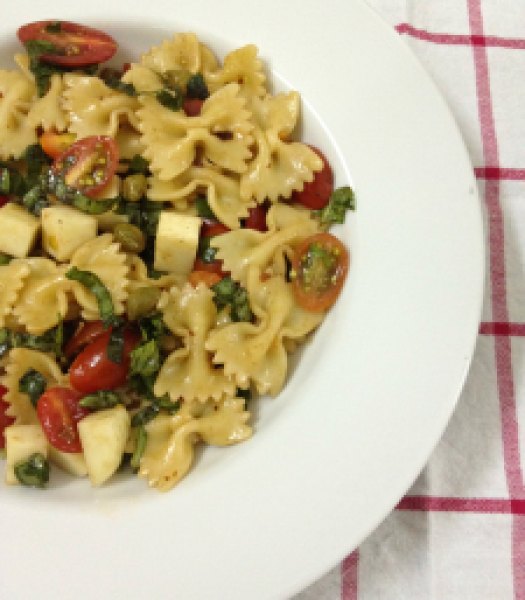
This time I brought together 2 of my favorites and created this dee-lish caprese pasta salad. Of course with a twist… I added capers for a little tang! And it really did wonders. This salad is so beautiful, adorned with pear tomatoes and bursting with basil! Hope you enjoy this as much as we did!

Happiest of Birthday Mother! Cheers!!!

Caprese Salad3

Caprese Pasta Salad
Servings: 4-5 as a side and 2-3 as a light lunch/dinner
Ingredients:
For salad:
  • 2 heaping cups bow-tie pasta
  • Around 20-25 pear tomatoes, sliced
  • 25-30 small cubes of Mozzarella
  • 2 Tbsp capers, drained & washed
  • 1/4 cup thinly sliced basil leaves
For dressing:
  • 2 cloves garlic, minced
  • 1 Tbsp balsamic vinegar
  • 1 Tbsp extra-virgin olive oil
  • A pinch of red chili flakes
  • Salt and pepper, to taste

Directions:

  1. Cook pasta in generously salted boiling water according to package directions till al-dante. Drain and rinse with cold water.
  2. In a large bowl, add pasta, sliced tomatoes, Mozzarella cheese cubes, capers and toss.
  3. In a small bowl, take all the ingredients mentioned under dressing and whisk.
  4. Add the dressing to the large bowl of salad ingredients and toss well. Taste and adjust the seasoning. Let it chill in refrigerator for half an hour. Top with sliced basil leaves just before serving.
Share this recipe:

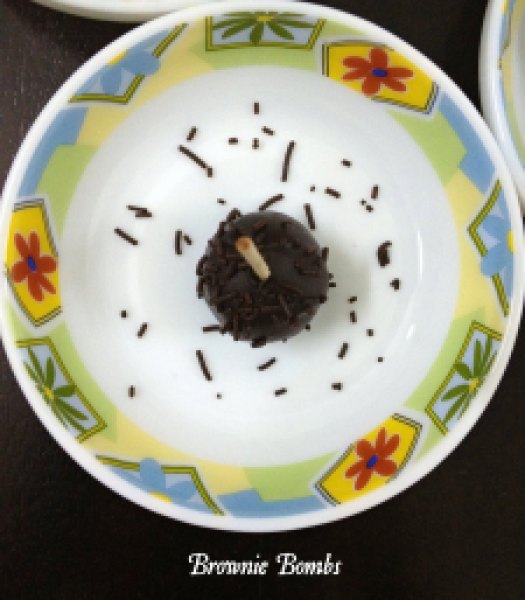
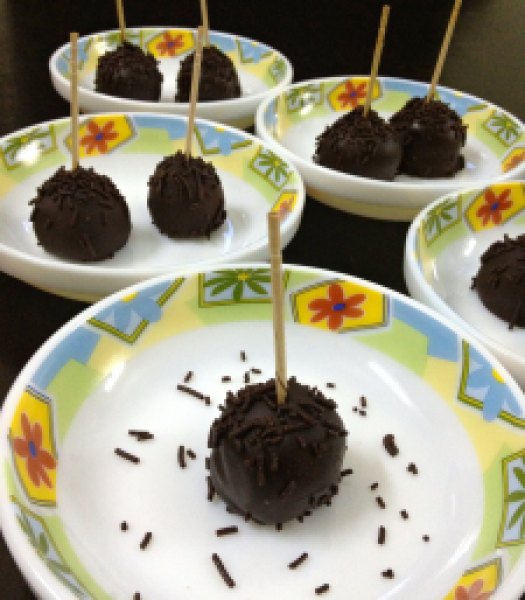
Brownie Bombs

Brownie Bombs3

I personally adore cake pops. They are pretty, deceptive and delicious little things. They look easy to make… In fact they are easy to make. Just a wee-bit time-consuming but easy.

This is my first post writing about them so I would like to be more elaborate. If we talk structurally, cake pops are nothing but the crumbled cake mixed with frosting that can be rolled into balls or formed into any imaginable different shapes. They are then placed on a lollipop stick or wooden skewers, dipped in chocolate and topped with decoration of choice.

Cake pops rage is still catching up in my part of the world and quickly! I have gobbled up plenty of chocolate cake balls in my lifetime while growing up (I mean it!) and they are my favorite till now. Now cake pop is something very similar to cake ball concept sans the outer chocolate layer. I can totally relate to them.

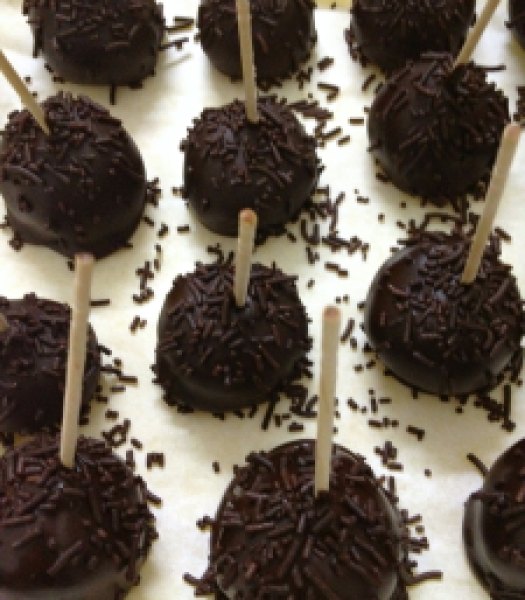
Brownie Bombs2

I instantly fell in love with the idea of making a bite-sized cake, decorated for individuals which is mess-free and gives complete portion-control! They’re perfect for parties. I had one such potluck to attend last Sunday and I was asked to bring a dessert for obvious reasons! I immediately knew cake pops would be perfect for that as it’s something which can be made ahead and I wanted an excuse try them at home anyway!

I didn’t have to do much of a research as in what type of cake-pop to make as I had a professional help. I recently bought a book  from The Australian Women’s Weekly ~ Cute Cake Pops. What an amazing little book! It had plenty of inspiration and fantastic ideas for making cake pops for every occasion! I wanted a crowd-pleasing chocolate and something simple for my first attempt hence I chose to make these brownie bombs from scratch. Yes, no cake-mix involved here. So I made some brownies and turned them into gorgeous cake-pops! Simple, no?!

Brownie Bombs1
Just after dipping and decorating

I had some extra melted chocolate after all the cake-pops were done dipping. Wanna know how I used the left-overs? That’s going to be a post for another day.. Stay tuned! 😉 Meanwhile enjoy these!

Brownie Bombs

Recipe adapted from Cute Cake Pops

Yields: 25-30 cake pops

Ingredients:

  • 75 gm butter, chopped coarsely
  • 100 gm dark eating (semi-sweet) chocolate, chopped coarsely
  • 1/3 cup (75 gm) caster sugar
  • 1 egg
  • 2/3 cup (100 gm) all-purpose flour
  • 2 Tbsp dark rum (I omitted it)
  • 200 gm dark chocolate melts
  • 30 lollipop stick or toothpicks with sharp edges trimmed
  • Chocolate sprinkles, to decorate

Directions:

  1. Preheat oven to 180°C/350°F.  Grease a deep 7-8 inch square cake pan; line base and sides with baking paper.
  2. In a medium bowl, melt butter and chopped chocolate in a microwave for about 1 minute stirring after 30 seconds. Stir till smooth and let cool for 10 minutes.
  3. Stir sugar, egg and flour into chocolate mixture. Spread into a cake pan; bake about 20 minutes. Cool in pan.
  4. Once cool, cut cake into large pieces; using a food processor, process cake with rum (if using) until mixture just comes together. You can do this step with hand also. Shape rounded teaspoons of the mixture into balls. Place on a baking paper-lined tray. Freeze for 1 hour or refrigerate for 3 hours or overnight, until firm.
  5. Stir chocolate melts in a medium heatproof bowl over a medium saucepan of simmering water until smooth (don’t let water touch base of bowl).
  6. Dip the end of one stick into the chocolate, then push it about halfway into a ball of brownie. Return to tray. Repeat with remaining sticks and balls of brownie. Freeze for about 5 minutes to set.
  7. Dip one cake pop into the melted chocolate or with the help of a spoon coat a cake pop, rocking back and forth to coat; do not swirl the pop, or it may break. Allow excess chocolate to drip back into bowl. Stand on a baking paper-lined oven tray; sprinkle with chocolate sprinkles before chocolate sets. Repeat with remaining cake pops and sprinkles. Stand at room temperature until set. Serve.

*Store cake pops in an airtight container at a cool room temperature until ready to serve. They will keep for up to a week.

Share this recipe:

Vanilla Buttermilk Eggless Sponge Cake

Vanilla Buttermilk Eggless Sponge-2

After the last post of SugarPlum Cinnamon Buttermilk Cake, many people wanted an eggless sponge cake. I knew I had to bake one immediately… hence this post.

This recipe is from my initial baking days… very simple and easy to make even for beginners… so naturally it never got posted on the blog. Not bragging but I thought it to be too simple to be posted here. But trust me, it is every bit delicious! This is my go-to recipe while baking for non egg-eaters and it has turned out perfect every single time so it is tried, tested and tasted recipe in a true sense!

Use this as your basic cake recipe and add any other ingredients you like to it. Cinnamon, chocolate, lemon… anything! Sky is truly a limit. Use any other fruit you like or even better, make it tropical (pineapple and coconut, anyone?) style! Getting ideas?! ?

This eggless sponge is moist, has tight crumb and relatively flat top which makes it perfect for a multi-layer cake for birthdays or for any other occasion. In past, I have successfully doubled and tripled this eggless sponge recipe to make a 2 or 3-layer celebratory cake. For frosting ideas and recipes, read the recipe notes at the end of this post.

Vanilla Buttermilk Eggless Sponge Cake-1

Previously I have always used fresh strawberries for this eggless sponge as seen in the picture above. This time I had Kiwi fruit on hand so I decided it was time for a change. I am not a fan of baked Kiwi fruit so I refrained from adding fruit pieces to the batter which I sometimes do with strawberries but if you have no such qualms then go ahead.

It is perfect for eating any time of the day!

Yup, even for breakfast!

It has yogurt and fruit! Totally acceptable, right?! 😉

Kiwi Buttermilk Cake - Eggless1


Recipe adapted from here

Print Recipe
Vanilla Buttermilk Sponge Cake ~ Eggless
Cuisine American
Prep Time 10 minutes
Cook Time 30 minutes
Servings
slices
Ingredients
Topping
Cuisine American
Prep Time 10 minutes
Cook Time 30 minutes
Servings
slices
Ingredients
Topping
Instructions
  1. Preheat the oven to 180°C/350°F. Spray a 6 or 8-inch baking dish with vegetable oil and line the bottom with parchment paper.
  2. Sift together flour, baking powder, baking soda and salt in a bowl.
  3. In a separate bowl, cream together butter, oil and sugar with electric mixer or hand whisk. Whisk in vanilla extract.
  4. Using rubber spatula, gently stir in dry ingredients to the wet ingredients in 2-parts alternating with yogurt/buttermilk, ending with dry ingredients. Do not over-mix the batter.
  5. Spoon the batter in a baking dish and smooth out the surface with the back of spoon. Top with Kiwi/strawberry slices and sprinkle with sugar. Bake for 25-30 minutes or till the toothpick inserted in the center comes out clean.
Recipe Notes

*Stays fresh for 3-4 days if refrigerated in an airtight container.
*Want to add fruit within the cake batter instead on top? Mix together about 1/2 generous cup of chopped fruit and 1 Tbsp flour, fold into the cake batter.
*You may double/triple/quadruple the recipe to make layers for a multi-layered cake. Use vanilla bean buttercream, fresh strawberry cream cheese frosting, lemon cream cheese frosting or coconut buttercream frosting recipe to decorate.

Share this recipe: